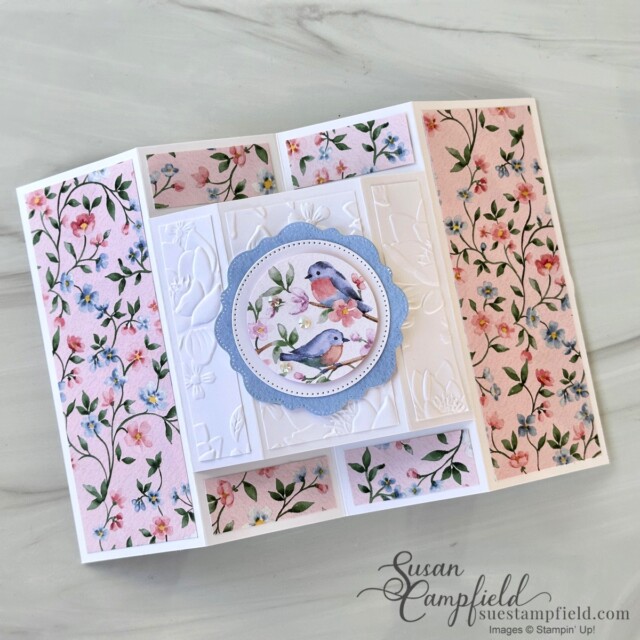
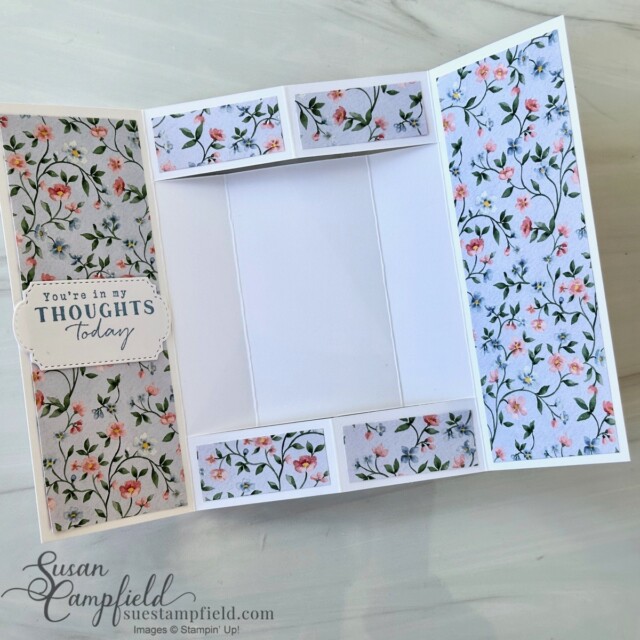
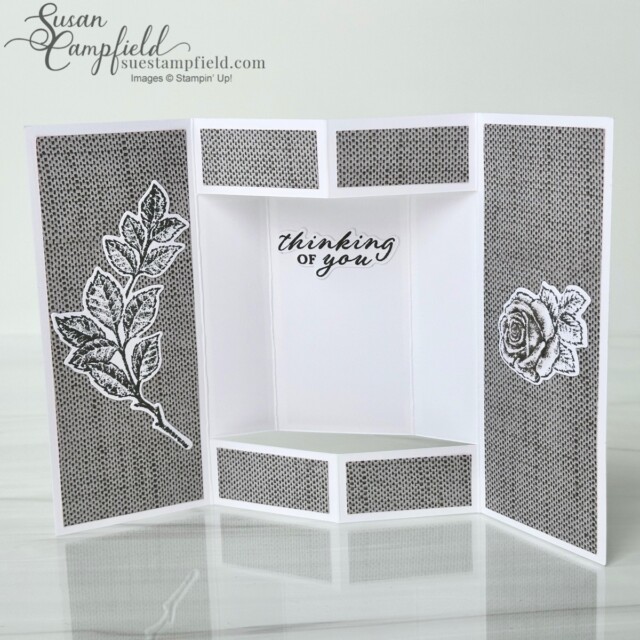
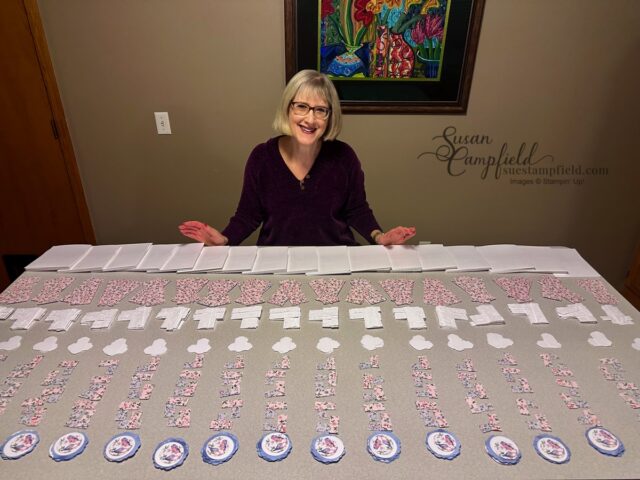
An amazing fun fold card that stand for display, and the center section pops out just like a box seat at a play or opera house. I created the Box Seat Fun Fold Card design for the January Suestampfield Crafternoon Creative Escape.

Five lovely and unique Box Seat fun fold cards to share with you today! And I have a link to a video tutorial that walks you through the basics of this Box Seat Fun Fold card and a purchasable PDF tutorial with step-by-step photos and instructions on how to make all five versions. When I designed this fun fold card I was struggling to find a name for it…
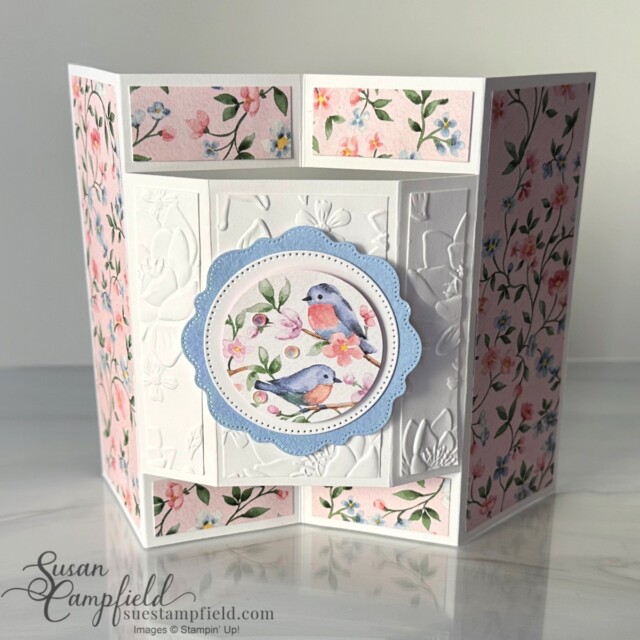
And then it dawned on me that the front middle section looked like a box seat at an old fashioned theatre or opera house!
Do you see the similarity?? So, that is how the Box Seat Fun Fold card got it’s name!
And yes, it absolutely fits in a standard envelope!
In these photos you can see both the front and the backside of this cool fold! This pretty version of the Box Seat Fun Fold card was the make and take for this month’s Crafternoon virtual class. Customers who placed a product order of $50 in my Stampin’ Up! online store before tax and shipping in December received the packet in January to make this card along with me in the video.
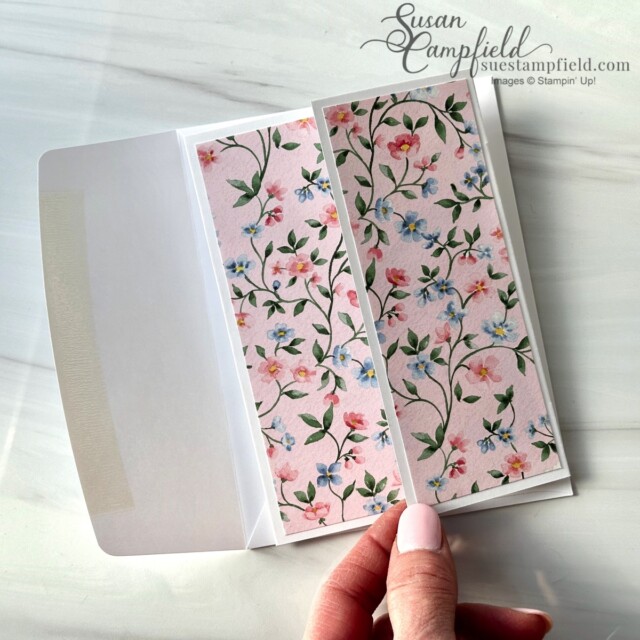
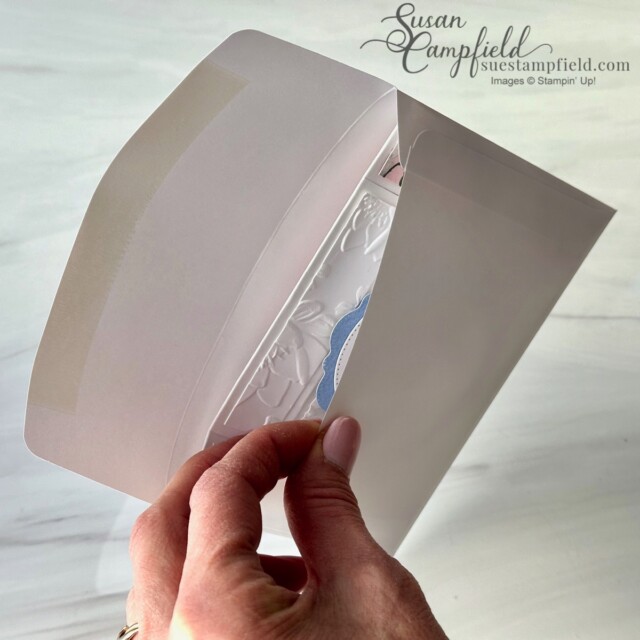
When you fold the card closed, the two side panels go to the back and slightly overlap. So the finished size of the card is 4-1/4″ x 5-1/2″ and it easily fits in a standard envelope.

This beautiful version of the card features the stunning Flight & Airy Designer Series Paper which is a FREE Sale-a-bration choice in January and February with a $50 order before tax and shipping (US pricing). The embossing folder is brand new also and it is a stunner! I used this Layered Florals 3D Embossing Folder on two of the Box Seat Fun Fold Cards because it is so beautiful.
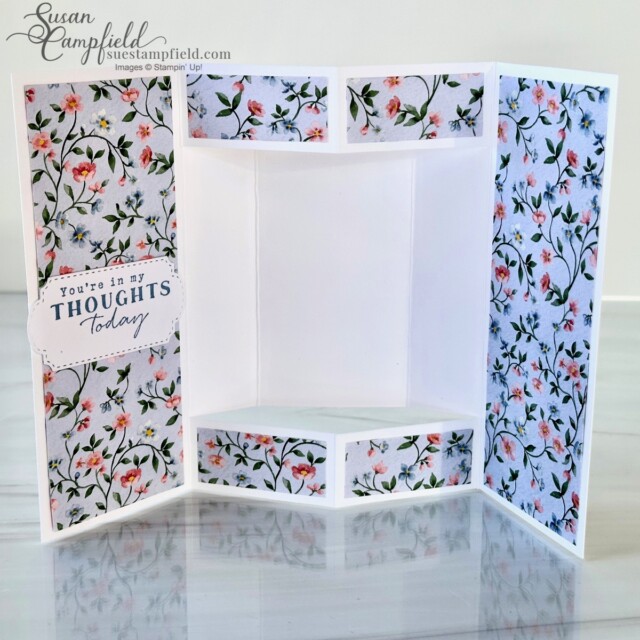
One of the things that I love about the Box Seat Fun Fold card is that both sides can be displayed and are equally gorgeous! The Box Seat Fun Fold card is also the perfect way to show off your pretty designer papers and fancy dies! This card design was inspired by crafter Ruth Hamilton. I found her card on Pinterest and adapted the design to create the Box Seat Fun Fold cards. You can see her card here: https://apassionforcards.blogspot.com/2015/04/bohemian-card-project.html My team member Rachel Tessman did a card with a similar construction called “The Center of Attention” card. The scores, folds, and construction is a little different, but the internal cutting and scoring is similar. You can see Rachel’s card here: https://stampyourartout.com/2023/02/easter-spring-center-of-attention-fun-fold-cards.html
Are you ready to see another Box Seat Fun Fold card?
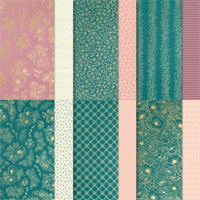
The gold metallic details in the Forever Love Designer Series Paper are absolutely gorgeous. Perfect for wedding cards, anniversary cards, and elegant birthday cards. As you can see, I once again used the Layered Florals embossing folder. This version of the Box Seat Fun Fold card has a Very Vanilla card base. For all of the versions I used the Thick Basic White or the Thick Very Vanilla for the card base to add stability to this standing card.
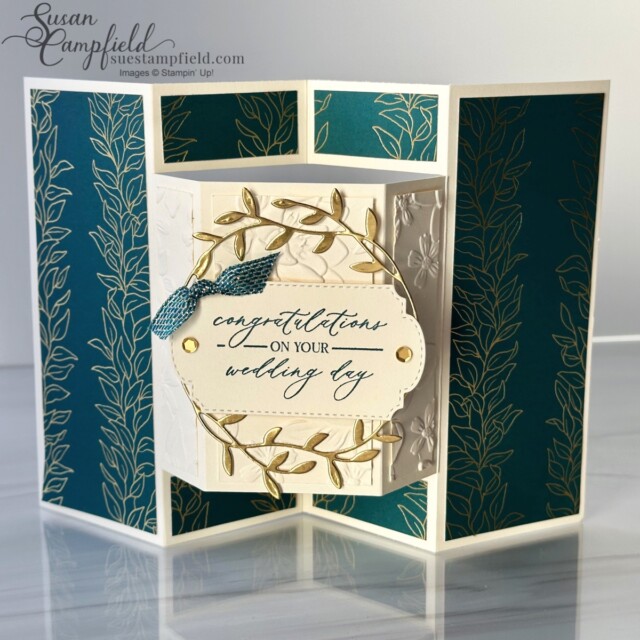
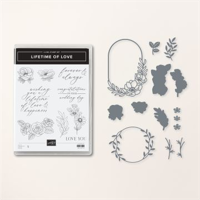
The Lifetime of Love bundle has some delicately beautiful dies like this circular vine. I die cut it out of the Gold Foil sheets which made it even more beautiful! The gold of the die cut and the embellishments also picks up the gold in the Forever Love Designer Series Paper.
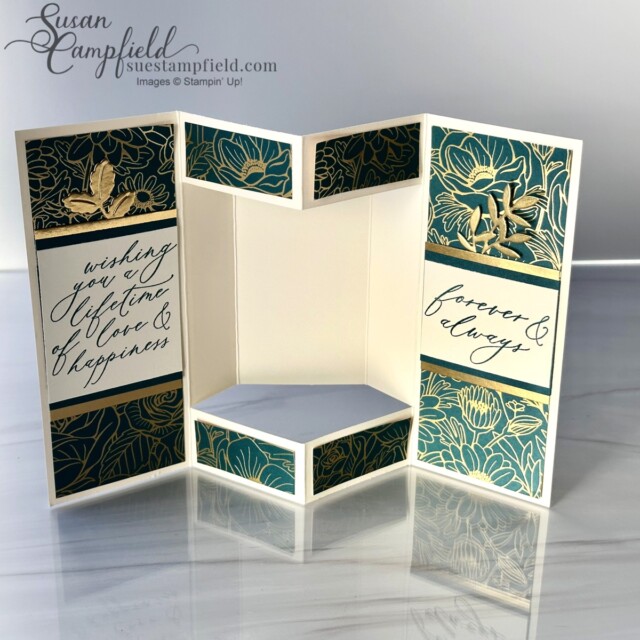
When the front of the card is that pretty, the back has to be pretty too, right?! Fortunately there are several different Pretty Peacock and gold patterns in the Forever Love pack to choose from – so it was easy to coordinate. And, of course, more gold die cuts with some of the other Lifetime of Love dies.


Do you like the frontside or the backside better? I can’t even choose one! Once again I used the Layered Florals on this Box Seat card – just as pretty as it was on the Flight & Airy card!

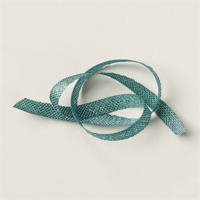
If you are a fan of the Pretty Peacock color, be sure to pick up some of this Pretty Peacock and Gold Metallic ribbon – it adds an elegant touch to your cards.
Ready for some more Box Seat Fun Fold Card designs?

This little valentine bee is buzzing by to share some words of love! The Bee Mine Suite in the Mini Catalog is so fun to create with! Instead of dies, this suite features the Bee Builder punch and the matching Bee My Valentine stamp set. All the instructions are in the step-by-step tutorial.
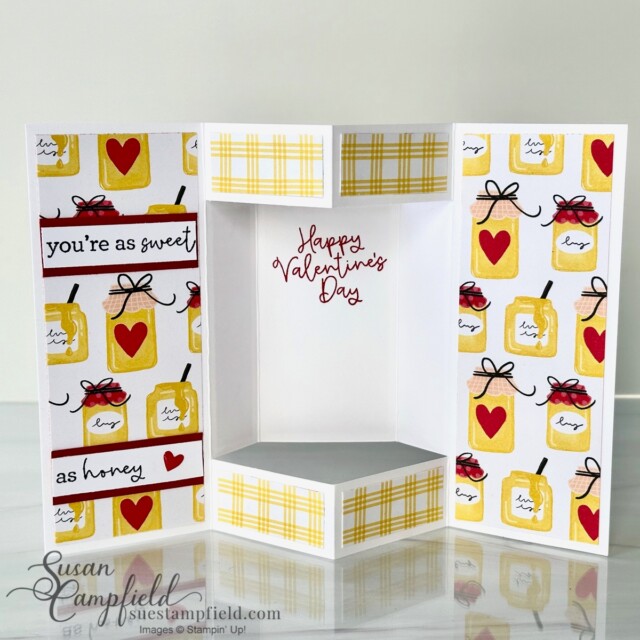
More sweetness on the backside with some honey! The Bee Mine paper is so cute!
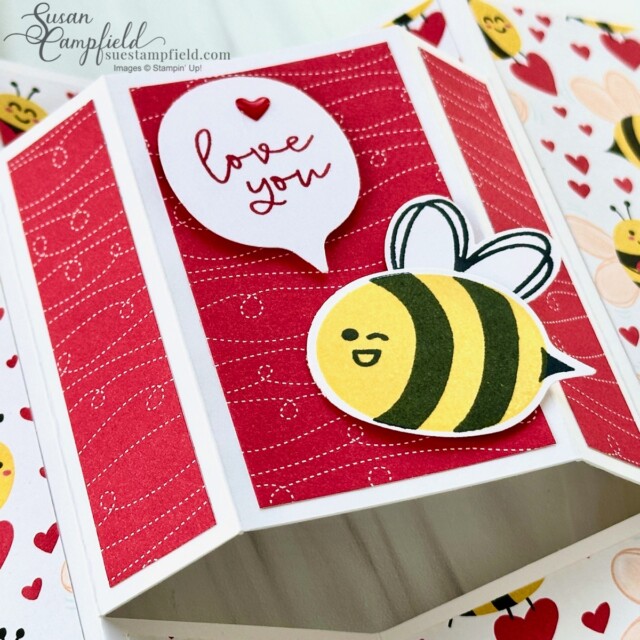
To make the speech bubble I used the Bee Builder Punch and just punched out another bee body – perfect!
Another Elegant Box Seat Card – so pretty in neutral colors of Pebbled Path and White.
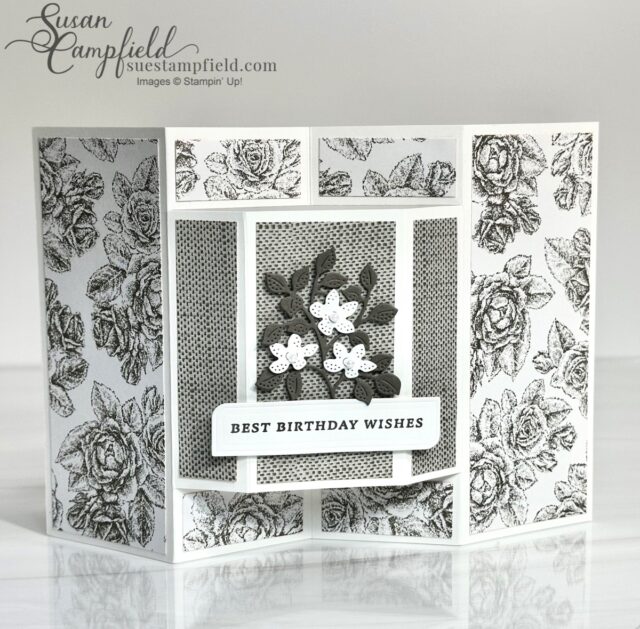
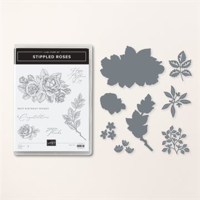
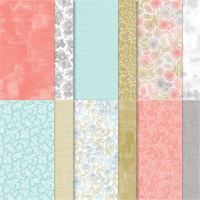
Softly Stippled Designer Series Paper is another FREE Sale-a-bration choice in January and February with a $50 order before tax and shipping (US pricing). There are also lots of colorful patterns in the package, but I love the elegance of the Pebbled Path and white. The stamp images and dies are from the Stippled Roses bundle which coordinates with this pretty free paper.
For the small rose that I put on the back of the card, I did add a bit of shimmer to the petals with the Wink of Stella glitter brush.
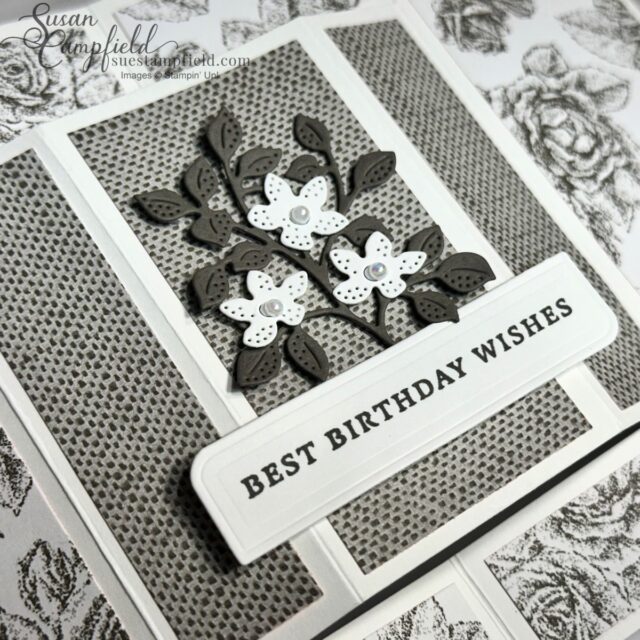
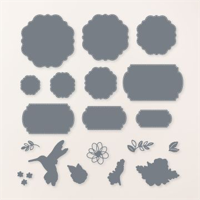
Iridescent Pearls in the center of the white flowers really makes them “pop”. Best Birthday Wishes is a stamp from the Stippled Roses bundle, and the label that I used for the sentiments is from the Wonderful Thoughts bundle. As is the die cut “Thinking of you” greeting on the back of the card.
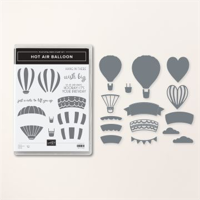
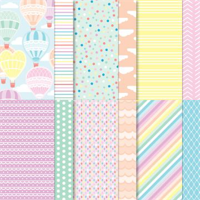
The Hot Air Balloon Box Seat Fun Fold card is so sweet! What a great way to send out birthday wishes!
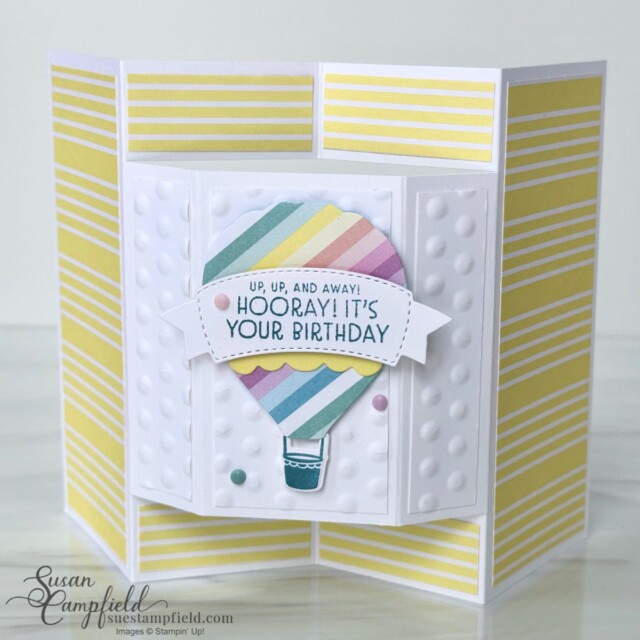
This pretty Lighter Thank Air Designer Series Paper has lovely, soft colors and is perfect for spring.
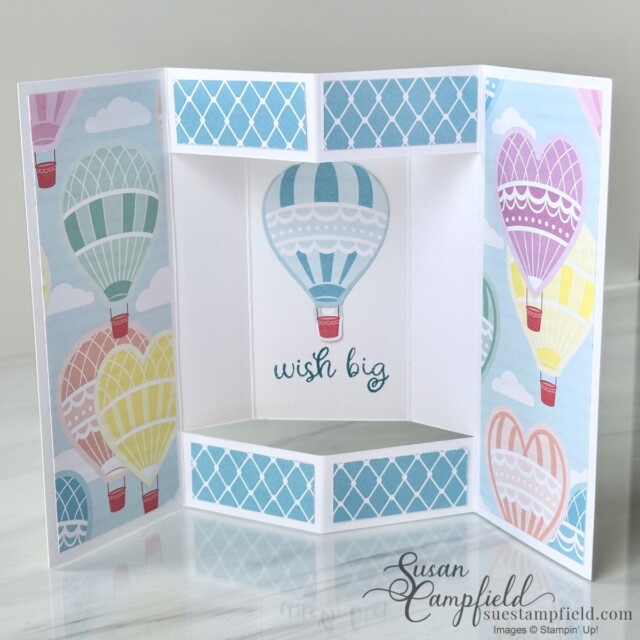
Inside the card is more of the cute Lighter Than Air Designer Series Paper. This “hot air balloon” pattern from the package matches the dies in the Hot Air Balloon bundle. So I was able to die cut the blue balloon and the balloon basket right out of the paper!

The Rainbow Adhesive-Backed Dots look just like the candy dots we would eat as kids! They add the cutest finishing touch to a card. And the hobnail pattern from the Basics 3D Embossing Folder (a set of three folders with different patterns on them), looks super cute with the Rainbow Adhesive-Backed Dots
Would you like to create along with me in the next Crafternoon?
It’s easy to join the virtual monthly Crafternoon event – I hope you join us next month!
When you place a $50 order with me (before tax and shipping) you will receive a packet in the mail the next Crafternoon and the PDF tutorial for free! The tutorial has all the card designs with dimensions, step by step instructions, photos, and the supplies for the projects. Place a qualifying order in my online store and the following month you will receive a packet for the next Crafternoon! No host code is required. A whole lot of love always goes into each and every packet! ❤️ Unfortunately I am only able to accept orders from those who live in the United States. However anyone around the globe can purchase any of the Crafternoon tutorials – you can find them all HERE.
Video tutorial for the Box Seat Fun Fold card design:
In this video, I walk you through the basics of this fun fold with the make-n-take version of the card. All of the dimensions, supplies, and step by step instructions for all five cards are in the PDF tutorial that is available for purchase. The tutorial can be downloaded and printed out to refer to while you craft. Or you can save the tutorial to your device and look at them that way. The tutorial includes measurements, photos, written instructions, and a list of all the supplies.
Details about the Box Seat Fun Fold Card Tutorial for purchase is below!
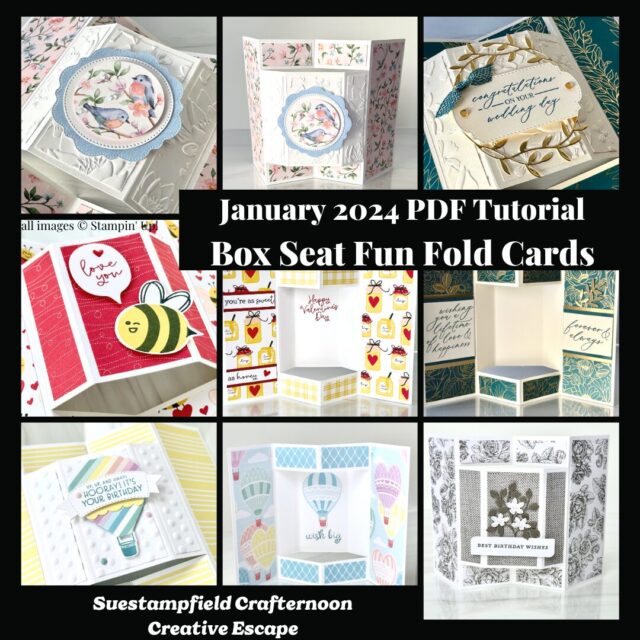
Ready to make the Box Seat Fun Fold Card design? It is easy with this tutorial. You can purchase the Box Seat Fun Fold Card Tutorial for $15 US. Print out the tutorial or review it on your device after you download it. The tutorial will walk you through how to recreate this fun fold style, step by step with instructions for all of the versions. I started Crafternoon in January of 2022 with a different unique fun fold every month. You can check out ALL 24 Crafternoon Fun Folds HERE.
NOTE: If you are a Stampin’ Up! demonstrator you are welcome to purchase these tutorials! If you would like to use these ideas to teach a class, instructing verbally is fine. However, please do NOT hand out, forward, replicate, or copy my written tutorials. If your customers wish to purchase the written tutorials please direct them to this blog post. Thank you for understanding!
Join the Crafternoon fun!
Thank you for letting me share this creative fun fold with you! I would love to send you a packet for next month’s Suestampfield Crafternoon Creative Escape. If you live in the United States, to qualify for a packet and tutorial, simply place a $50 order before tax and shipping in my online Stampin’ Up! store HERE. Happy creating!


Your sample cards are wonderful! I’m definitely going to give it a try. I really love that Flight & Airy dsp!!!
Thank you for your kind words, Vicki. I hope you will give it a try. Let me know if you run into any issues. Happy creating!
You are so talented and fun to watch! Love the cards and using different dsp makes each card unique.
Thank you for your kind words, Susan. I love DSP so it is easy for me to keep creating with all that beautiful paper. Happy creating!
Hi Susan, Your cards are wonderful! I love how you always show a variety of cards using the same template. Thank you for the video and for sharing your talent!
Thank you for your kind words, Laura. Happy creating!
What an awesome fun fold. Great name. You are so creative – love all of the different design ideas you shared. It is hard to pick a favourite. Thank you so much.
Thank you for your kind words, Sandra. That’s okay, you don’t have to choose a favorite. Happy creating!
I MADE A VALENTINE CARD.
Question: I took the class you sent me. I could not fine the instructions on this
Box Seat Fun Fold after the class. Do we get the instructions free? or do we have to buy them?
Hi Jo! You absolutely earned the tutorial for free because you placed a qualifying order in December. The tutorial was emailed to you back on January 25th – perhaps it went into a promotion folder. I just emailed you the link to the tutorials – happy creating!
I am interested in purchasing the Flight & Airy paper package. I have searched everywhere and cannot find it ~
Hi Jeri! Unfortunately that paper was only available in January and February and is now retired. I’m sending you an email with some additional information.
Hello Susan. Your creativity in all your cards is so inspiring and beautiful. Thank you for all your inspirational videos. Thank you for sharing your Mother’s Day photos at the Christmas Tree Farm with your Mom and family members. Beautiful photos. You all look alike.
Clarkston, MI 🥰🌹
Susan, thank you so much for your kind words! I’m glad you enjoyed the project sheet email. I love sharing special times with my family 💖 Happy creating! Susan