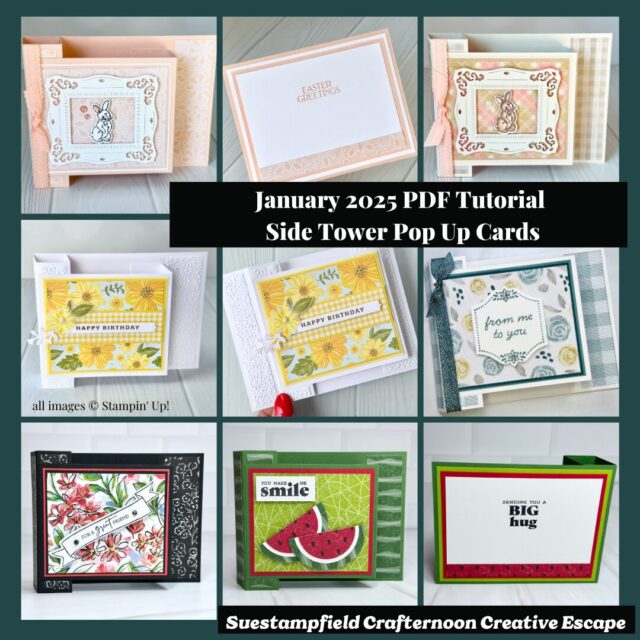
Wow your friends with these freestanding pop up cards!
In my January Virtual Crafternoon class, we’re exploring the magic of the Side Tower Pop Up fun fold card—a unique fold that stands for display yet flattens to fit into a standard A2 envelope. In this blog post, we’ll explore six different versions of this fold, each with its own unique twist using a variety of Stampin’ Up! products. I have 6 different designs to share with you of the Side Tower Pop Up Cards, a video tutorial, and a purchasable PDF tutorial with step-by-step photos and instructions on how to make all the versions. All six cards are pictured below.
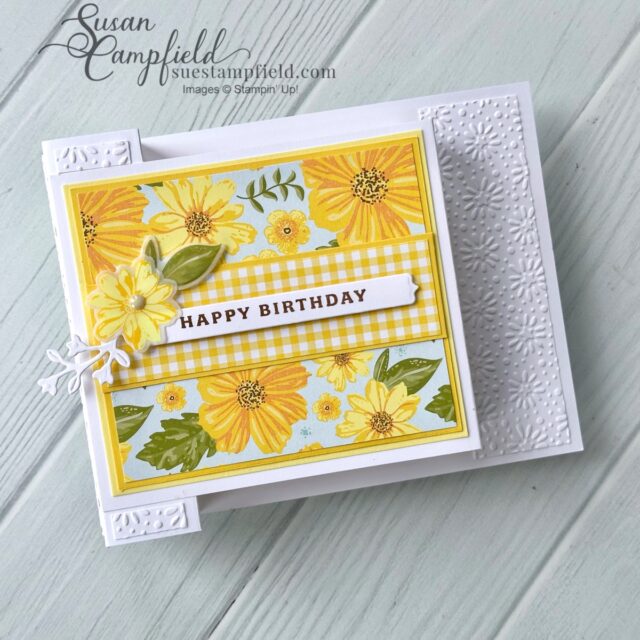

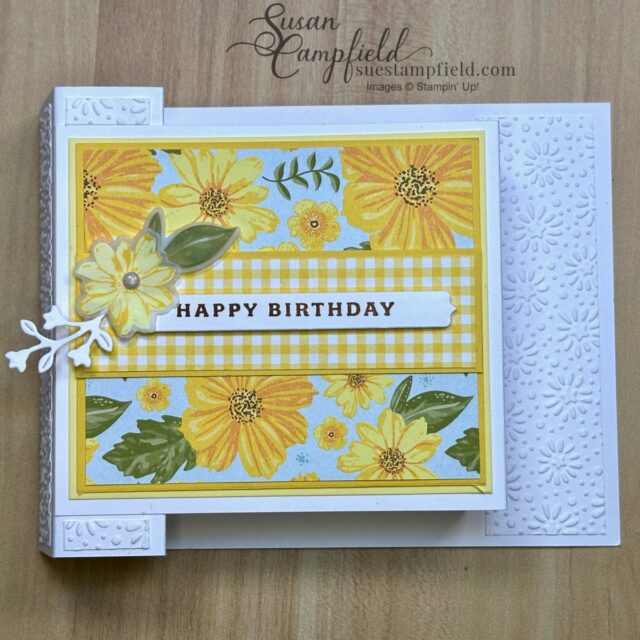
Delightful Wishes Side Tower Pop Up Card
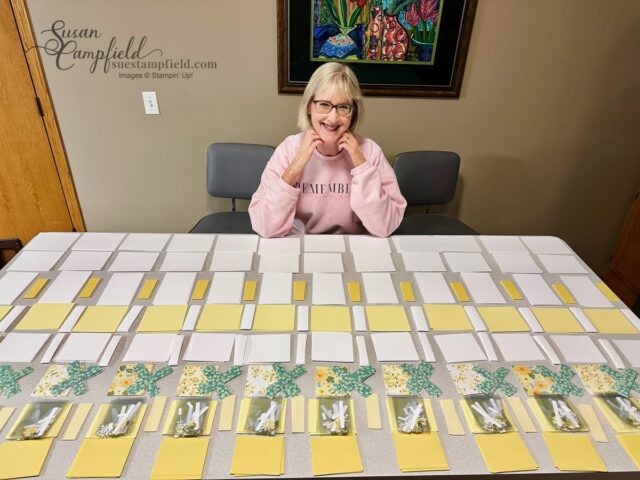
Our January Crafternoon fun fold packet project showcased the cheerful Delightful Wishes bundle, paired perfectly with the Floral Delight Designer Series Paper, the soft Floral & Gingham Vellum, and the stunning Starstruck embossing folder—available as a Sale-a-bration reward (free with a $60 purchase in January and February). This bright and sunny design, full of yellow hues, is like a little burst of sunshine on paper—perfect for lifting someone’s spirits or celebrating a special moment. Customers who placed a $50 product order (before tax and shipping) in my Stampin’ Up! online store during December received a packet in January to create this happy card alongside me in the video tutorial. It’s a simple yet heartfelt way to spread joy one handmade card at a time!
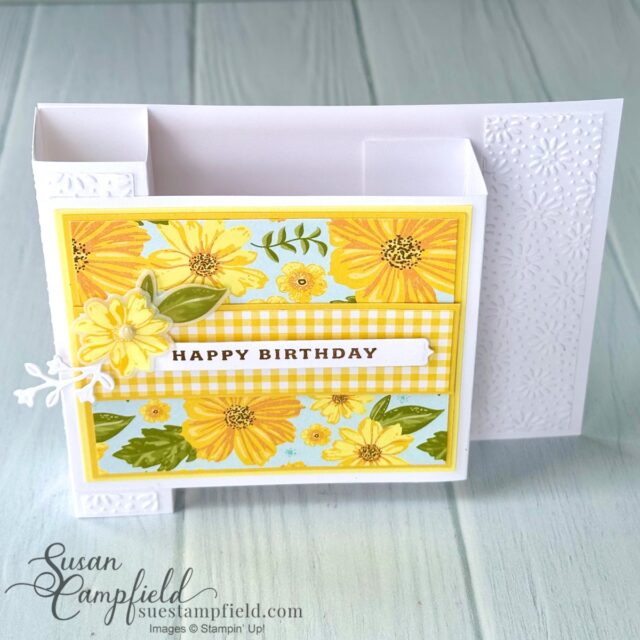
One of the unique features of the Side Tower Pop Up Card design is the box shaped tower that pops up along with the front section of the card. This creates a real “wow” when the card opens! The tower also helps the card to stand for display. All the details are in the Side Tower Pop Up Card step-by-step tutorial!

Of course, the side tower and pop up panel flatten completely for mailing.
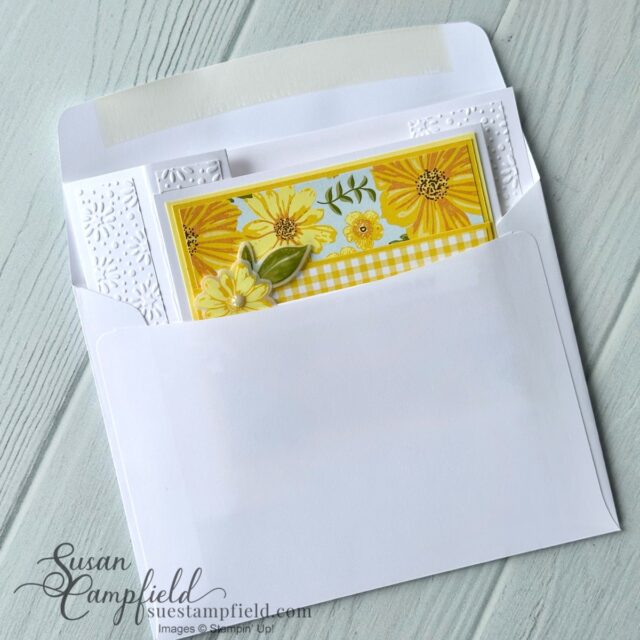

Finished size for the Side Tower Pop Up Cards is 4-1/4″ x 5-1/2″ and they all fit in a standard A2 Envelope.
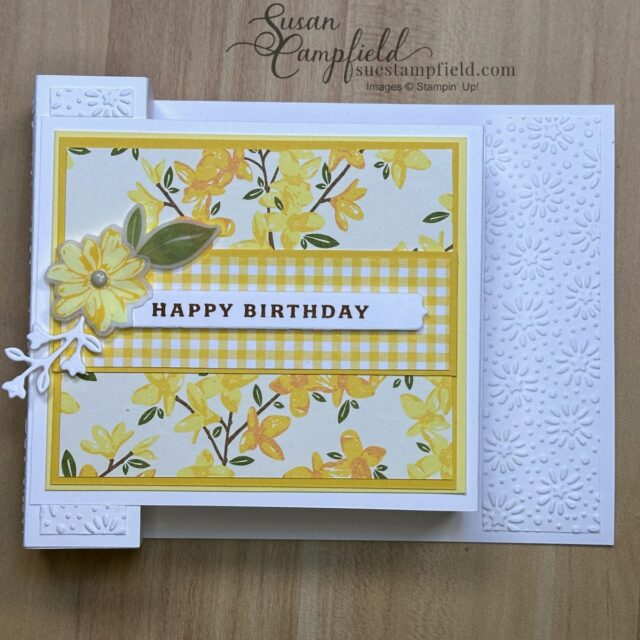
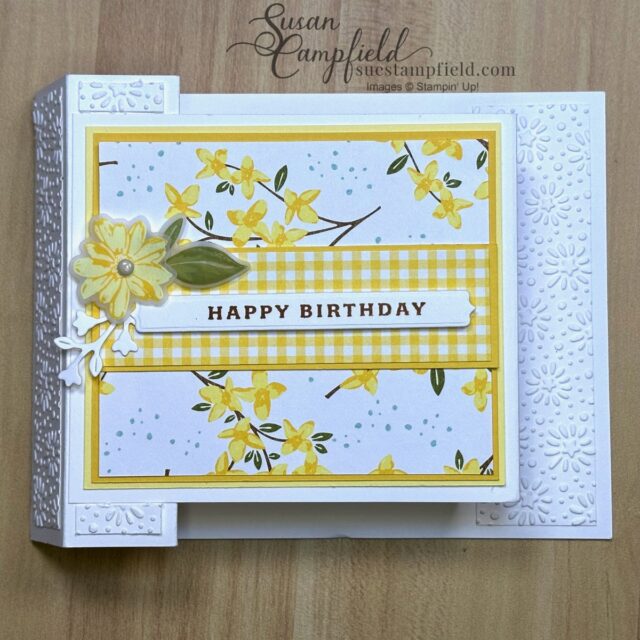
The Floral Delight Designer Series Paper has many beautiful designs, so it’s easy to recreate this card with multiple designs in the pack. Pictured above are the three patterns I used – and they all pair perfectly with the pretty yellow gingham pattern!
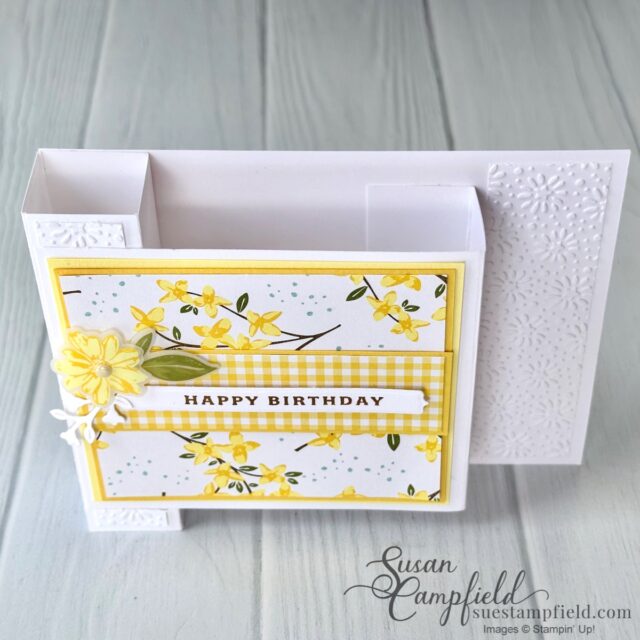
In this “top down” view you can see the overall construction of the card and the side tower. The beautiful flower and leaves on the front of the card are die cut from the Floral & Gingham Vellum with the Delightful Wishes dies – such a soft, pretty look! The white floral sprig is from the Heart Shaped dies and adds an extra flourish to the design.
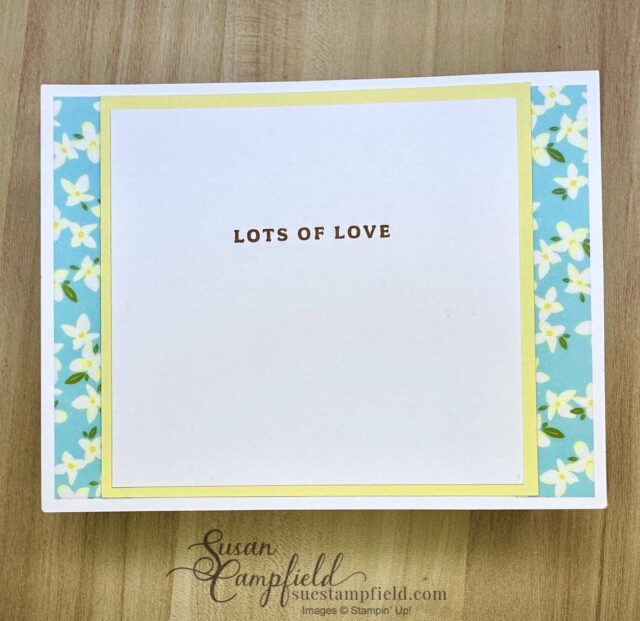
The “inside” greeting for this style of card is on the back of the card. The “Lots of Love” greeting is also from the Delightful Wishes bundle. The pretty decorative vellum pieces from the Floral & Gingham Vellum along with the layered center add a finished look to the card. A huge thank you to Susan Tierney-Cockburn for inspiring me to create this fold. I found her 6″ x 6″ side tower card on Pinterest and I redesigned it into a 4-1/4″ x 5-1/2″ card. Thank you for the inspiration Susan!
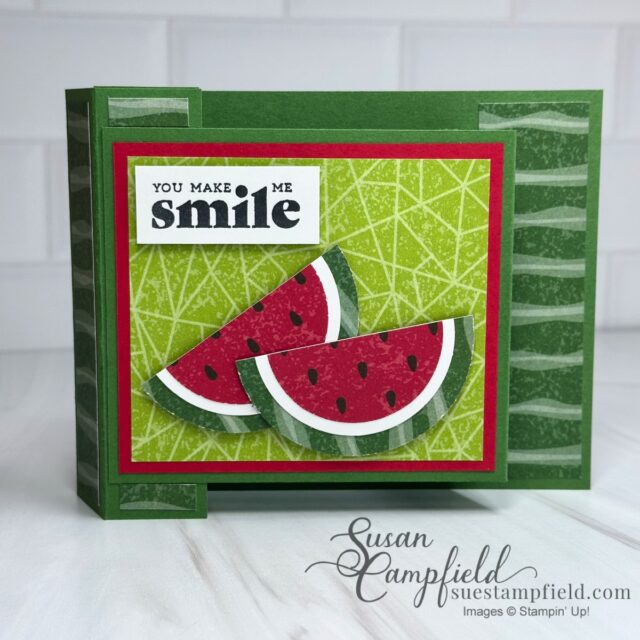
Yum! The Watermelon Side Tower Pop Up Card Looks Good Enough To Eat!
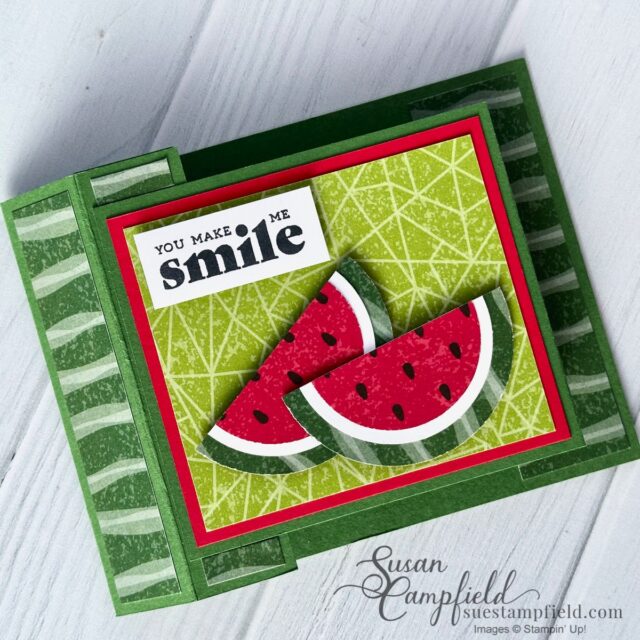
Bring a touch of summer warmth to these chilly winter days with this cheerful version of the Side Tower Pop-Up card! It features the colorful Fruit Salad Designer Series Paper—a free Sale-a-bration item (yours with a $60 USD purchase in January and February, while supplies last). The patterned paper along the edges looks like watermelon rind, perfectly complementing the watermelon slices on the front. These happy watermelon slices are easy to create using circle punches or dies, and I guide you step-by-step in the tutorial. Whether you’re making this card for Valentine’s Day or sending a little slice of sunshine to a friend, this card is sure to brighten anyone’s day!
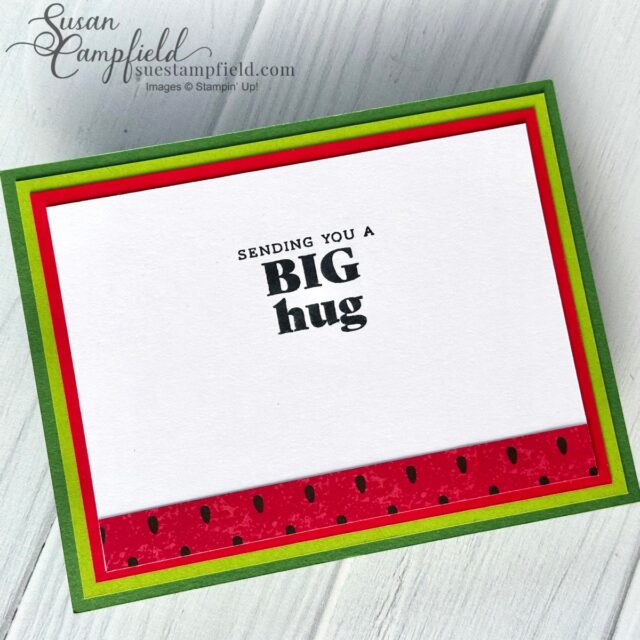
The greeting on the front and the greeting on the back of the card are both from the Hugs For Love stamp set – this versatile stamp set is the perfect compliment to this cheerful card.
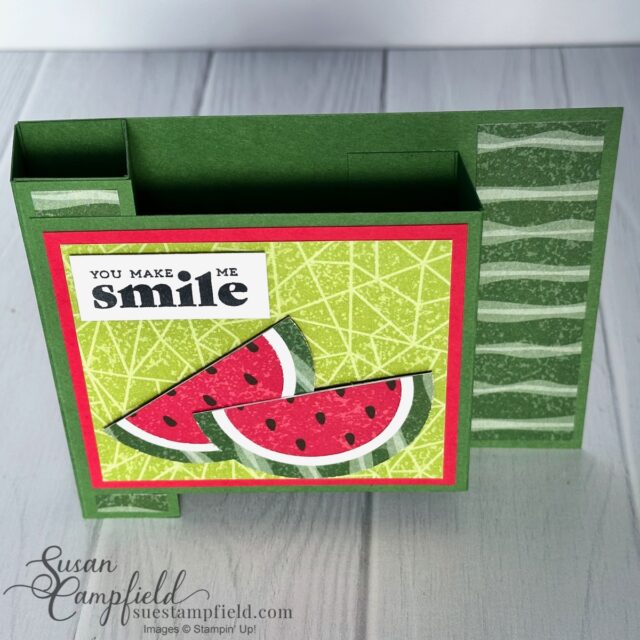
I love the 3D effect created when the card is standing! And it is so magical how it collapses to be completely flat!
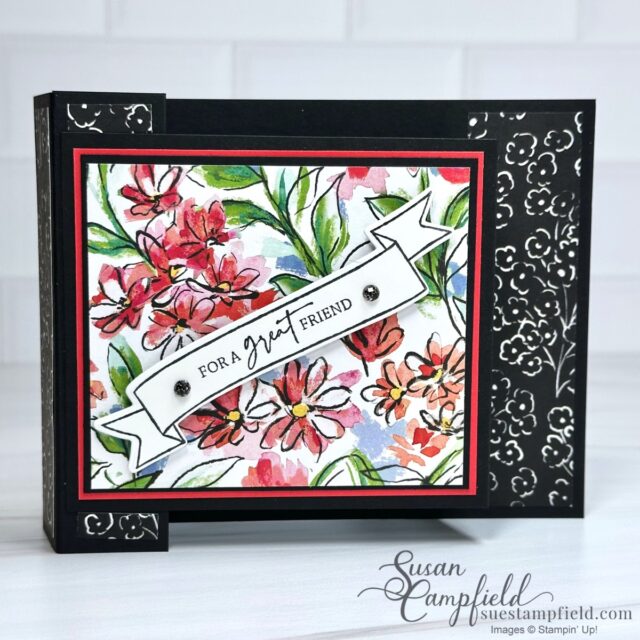
Beautiful Mixed Media Floral Side Tower Pop Up Card That Looks Like a Present!
Wow! The Mixed Media Florals Designer Series Paper makes stunning cards – I love the “pop” of color from the Poppy Parade layer – especially when paired with black cardstock. The perfect for this Side Tower Pop Up!
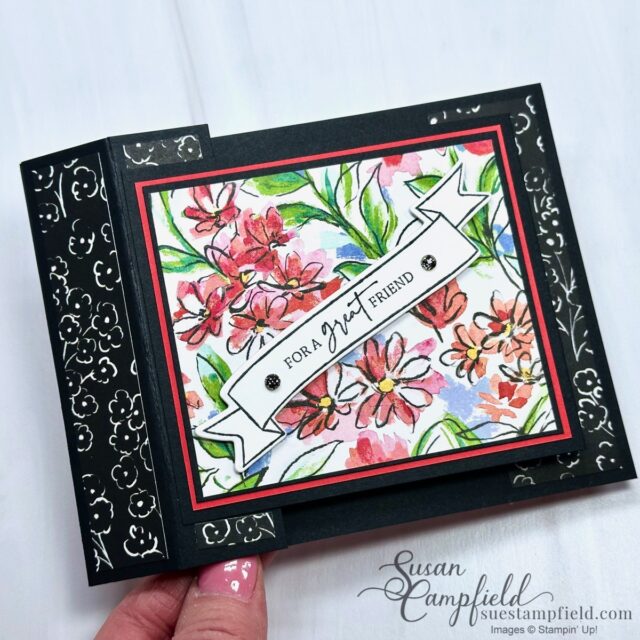
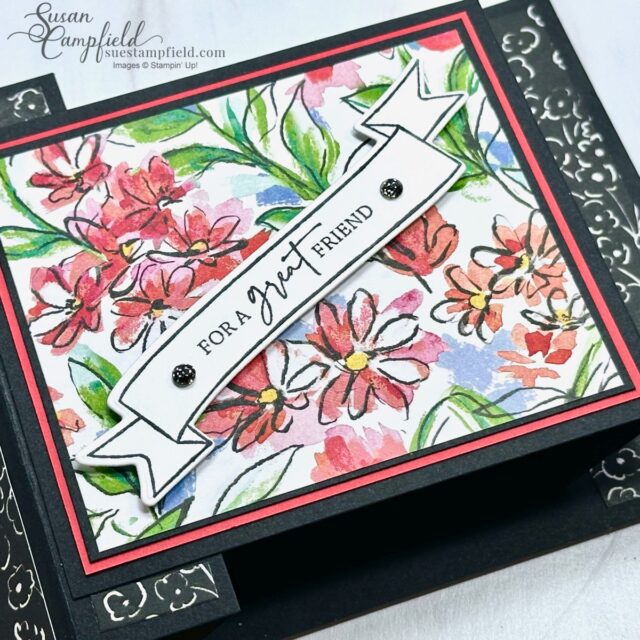
The ribbon banner and greeting are from the Mixed Labels bundle – I love how it makes the card look like a present! And to make it a bit “extra” – I added some bling with the black gems from the Adhesive-Backed Sparkle Gems.
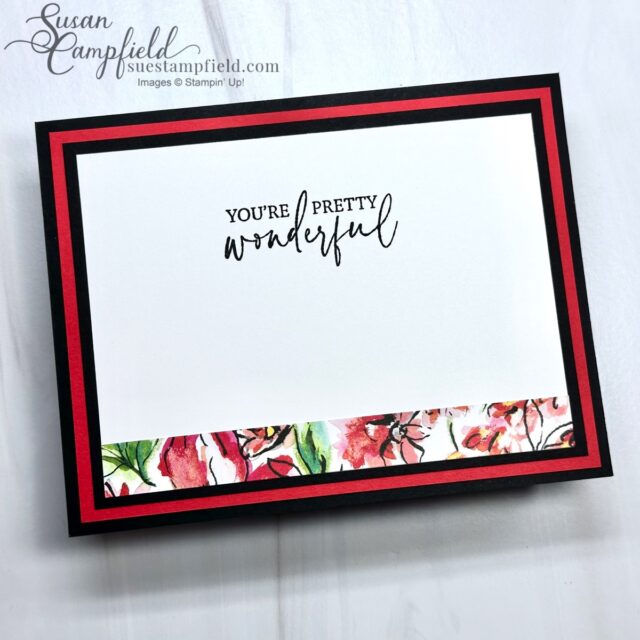
On the back of every card I have added a bit of pretty paper – it ties the back of the card together with the front of the card and adds a spark of happiness on the backside!
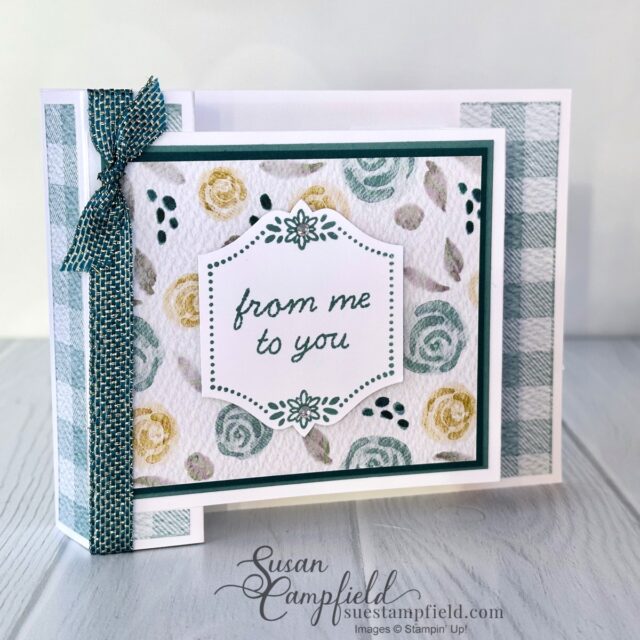
Bright Borders Side Tower Pop Up Card Featuring the Everyday Happiness Designer Series Paper

Have you discovered the Everyday Happiness Designer Series Paper yet? It’s a true “hidden gem” that feels like a breath of fresh air! With its soft, delicate colors and stunning watercolor-like texture, it almost looks like premium, heavyweight watercolor paper, even though it is the standard weight. It is perfect for adding a soft elegant touch to your handmade creations. Although it’s part of the scrapbooking collection released on January 7th, it’s incredibly versatile for cardmaking too. You can check out all the patterns in the pack here.

The frame and greeting on the front are from the Bright Borders stamp set, which is made to pair perfectly with the To The Point label punch. To elevate the design, I’ve added the elegant Pretty Peacock and Gold Metallic ribbon, which accents the soft tones of the Everyday Happiness Designer Series Paper beautifully. The Side Tower design is especially perfect for showcasing ribbon accents—you can thread it through the tower for a touch of luxury that truly stands out.
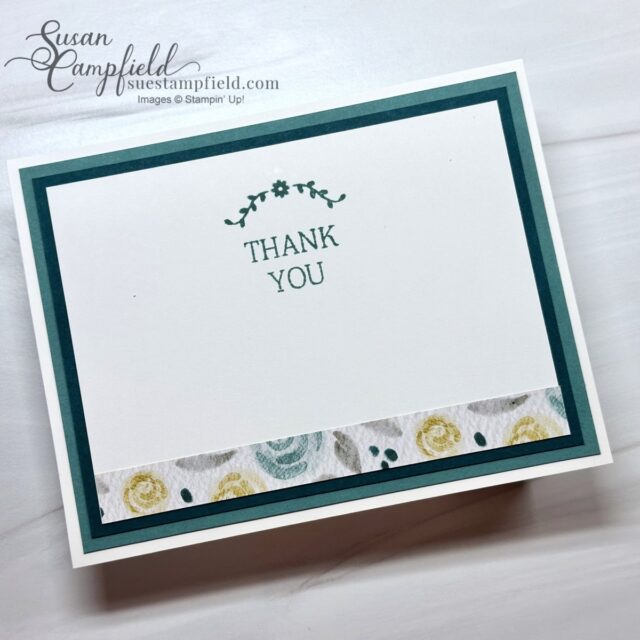
The words and image on the backside are also from the Bright Border stamp set – so soft and pretty in Lost Lagoon ink! The layer of Pretty Peacock cardstock makes the pretty paper pop.
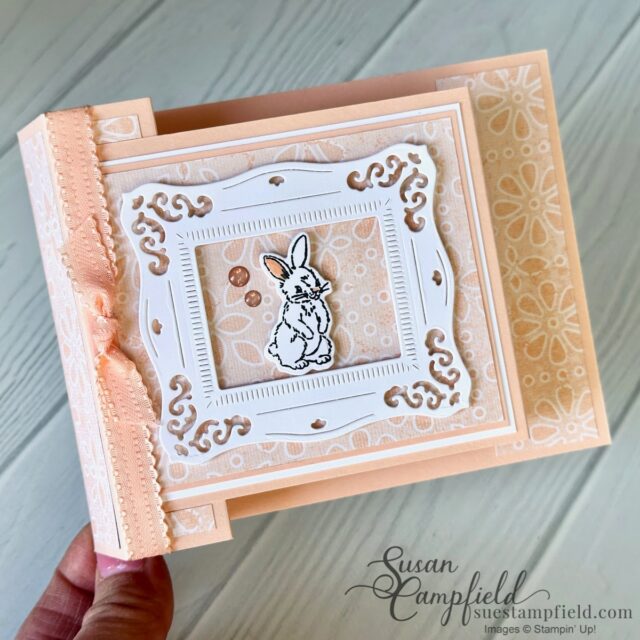
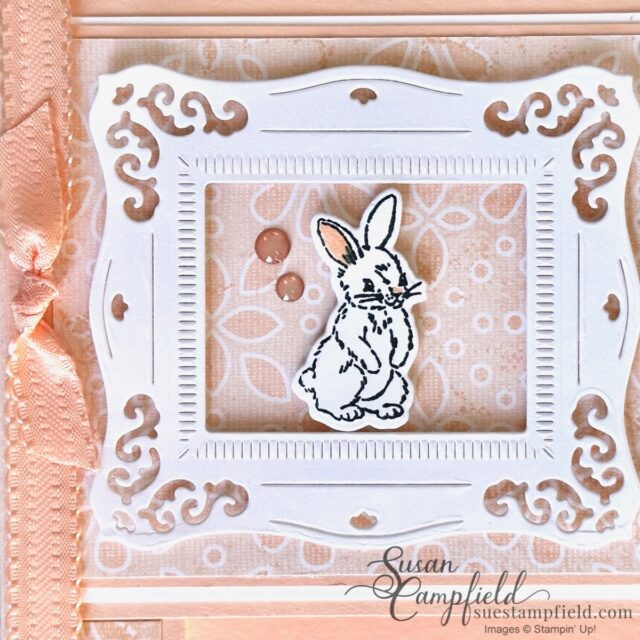
Storybook Friends Timeless Plaid Side Tower Pop Up Card
This sweet bunny card brings back such warm memories of my childhood. When I was little, my mother used to read us the charming tales of Beatrix Potter. I can still remember the adventures of Peter Rabbit and his friends, brought to life through those beautiful watercolor illustrations. The Storybook Friends bundle reminds me so much of those books! Whether you color the bunny yourself or use one of the pre-made alternatives, this card is sure bring a little extra joy to anyone who receives it.
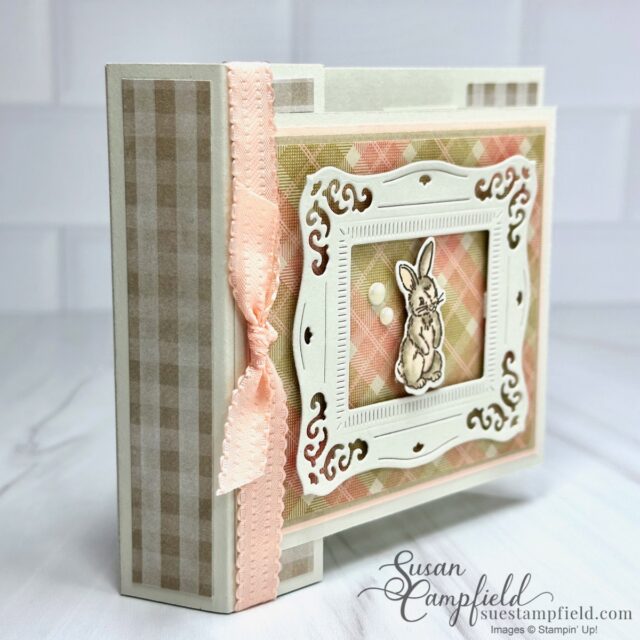
And the Storybook Friends bundle makes it so easy to create the most darling designs! For this version, I’ve paired it with coordinating products from the Storybook Moments suite, including the beauty of the Timeless Plaid Designer Series Paper, the soft sweetness of the Petal Pink Scalloped Ribbon, and a touch of vintage elegance with the Antique Pearls.
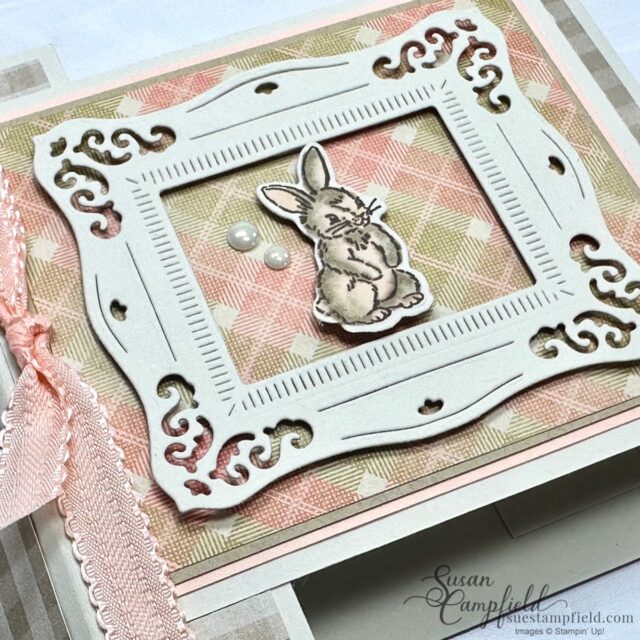
The bunny steals the show, stamped in Early Espresso on Basic Beige cardstock and brought to life with just two sets of Stampin’ Blends: the Petal Pink and Crumb Cake combo packs. In the tutorial, I guide you step-by-step through coloring the bunny, so you can recreate this look with ease. The frame is also from the Storybook Friends bundle, in fact, there are 3 different ornate frames in the bundle and they all make such elegant cards!
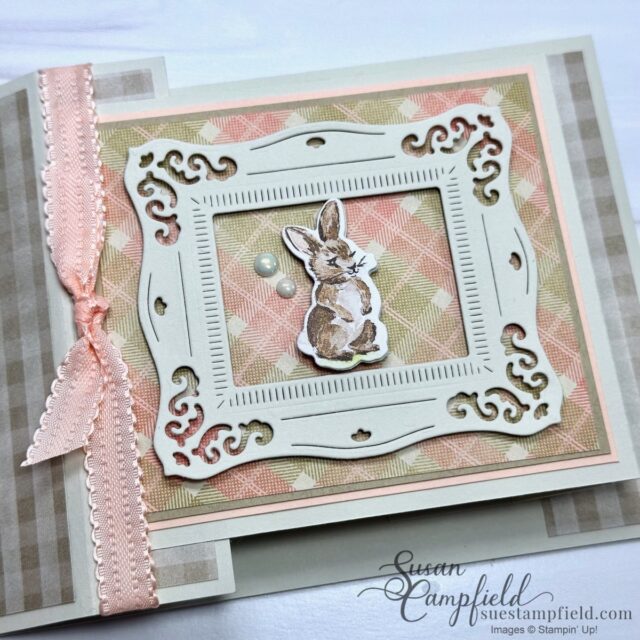
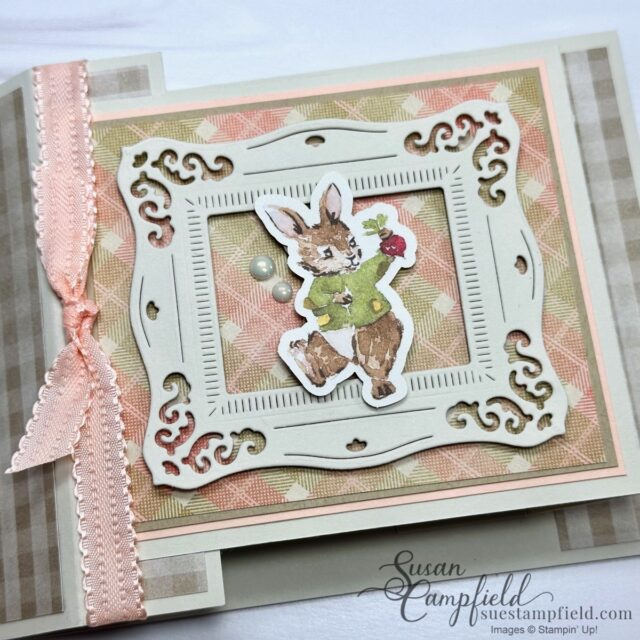
Not a fan of coloring? No problem! I’ve included two equally adorable alternatives in the tutorial. In the photo above on the left, the bunny is die-cut directly from the Storybook Moments Designer Series Paper, giving you a beautifully colored image with no extra effort. On the right, the bunny is punched from the pre-die-cut pieces included in the same Designer Series Paper—quick, easy, and just as adorable! Whichever option you choose, you’ll end up with an adorable card that’s sure to bring a smile.
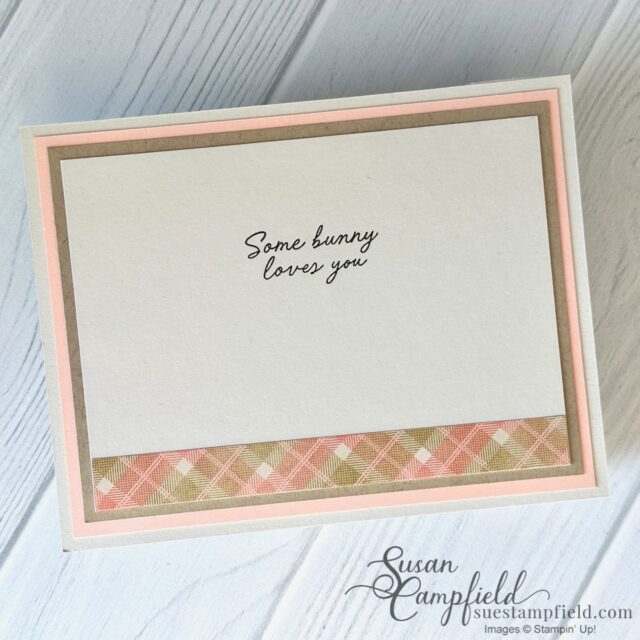
Isn’t the ‘Some bunny loves you’ sentiment from the Storybook Friends stamp set just the sweetest? It’s the perfect message to brighten someone’s day and remind them they’re loved.
Storybook Friends Country Lace Side Tower Pop Up Card

I had so much fun with the Storybook Friends bundle that I couldn’t resist creating one more Side Tower Pop-Up card! For the pretty paper I used the Country Lace Designer Series Paper from the annual catalog – the Petal Pink eyelet pattern was perfect! The dots are from the Low-Profile Dots, an online exclusive product.
This time, I kept it sweet and simple by stamping the bunny in Tuxedo Black ink and coloring just the inside of one ear and the nose with the Petal Pink Stampin’ Write Marker from the Subtles assortment pack. It’s such an easy and elegant way to highlight the adorable white bunny! By the way, did you know that you can get two color family assortment packs of markers for free in January and February in the Demonstrator Starter Kit? If you would like more information about the demonstrator starter kit, please contact me. Once you purchase the starter kit you become a demonstrator and can enjoy the 20% demonstrator discount on ALL your purchases.
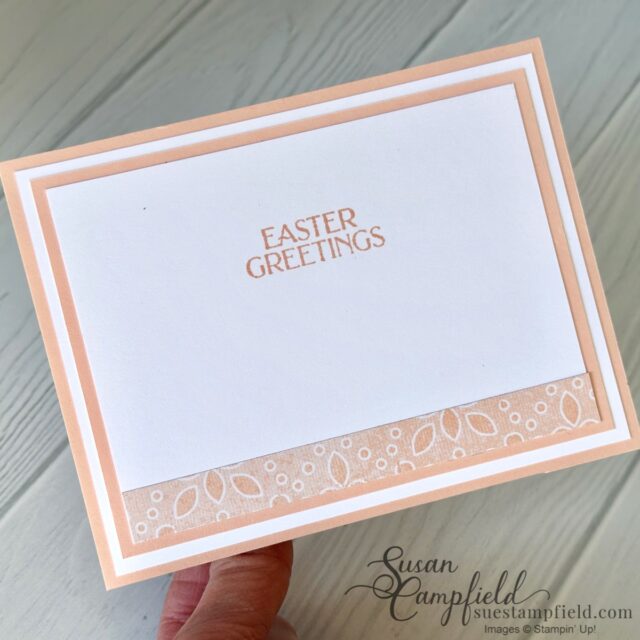
I decided to use an Easter sentiment on my card, but it would make a super cute baby card too!
Would you like to create along with me in the next Crafternoon?
It’s easy to join the virtual monthly Crafternoon event – I hope you join us next month!
How to join the fun? When you place a $50 Stampin’ Up! product order with me (before tax and shipping) you will receive a packet in the mail the following month for the next Crafternoon AND you will get the PDF tutorial for that month’s Crafternoon for free! No host code is required. The tutorial has all the card designs with dimensions, step-by-step instructions, photos, and the supplies for the projects. A whole lot of love always goes into each and every packet! ❤️ Unfortunately I am only able to accept Stampin’ Up! product orders from those who live in the United States. However anyone around the globe can purchase any of the Crafternoon tutorials – you can find them all HERE.
Video tutorial for the Side Tower Pop Up Cards.
In this video, I walk you through assembling the Delightful Wishes Side Tower Pop Up card. Details for all the designs are in the Side Tower Pop Up Card digital PDF tutorial including all of the dimensions, supplies, and step-by-step instructions for all the cards. The digital tutorial can be downloaded and printed to refer to while you craft. Or you can save the tutorial to your device and look at it that way.

Details about the Side Tower Pop Up Card Tutorial for purchase are below!
Ready to make the Side Tower Pop Up cards? It is easy with this tutorial. You can purchase the Side Tower Pop Up Card Tutorial for $15 US. Print the tutorial or review it on your device after you download it. The tutorial will walk you through how to recreate this fun fold style, step-by-step with instructions for all of the versions. I started Crafternoon in January of 2022 with a different unique fun fold every month. You can check out ALL 37 Crafternoon Fun Folds HERE.
NOTE: If you are a Stampin’ Up! demonstrator you are welcome to purchase these tutorials! If you would like to use these ideas to teach a class, instructing verbally is fine. However, please do NOT hand out, forward, replicate, or copy my written tutorials. If your customers wish to purchase the written tutorials please direct them to this blog post. Thank you for understanding!
Join the Crafternoon fun!
Thank you for letting me share this creative fun fold with you! I would love to send you a packet for next month’s Suestampfield Crafternoon Creative Escape. If you live in the United States, to qualify for a packet and tutorial, simply place a $50 order of Stampin’ Up! product before tax and shipping in my online Stampin’ Up! store HERE. No host code required. Happy creating!


Your cards have been over the top lately. You make creating cards look so easy.Thank you for sharing.
Thank you so much for your kind words Alice! Happy creating!
Enjoyed your tutorial for the Side Tower Pop up card
I live in Canada . I don’t remember when the written tutorial will be available for this fun fold card. I have signed up but didn’t catch when ready to view to get the details for the cutting & folding.
thanks
Leesa Knight
dlk10899@gmail.com
Hi Lisa! I’m so glad that you liked the Side Tower Pop Up card from my January Crafternoon Class! This is one of my paid tutorials, you can find the PDF tutorial complete with instructions for making all 6 cards with step by step photos in my tutorial shop here: https://suestampfield.com/product-category/tutorials-for-sale/. Anyone around the globe can purchase the tutorials. I also send out free project sheet emails twice a month for other projects. The next one is coming out very soon – I see that you are already subscribed to those emails so you should be all set! Happy creating!
Thank you for sharing those beautiful cards with us
I am from Canada but I do enjoy your videos
You have a special place in my Pinterest corner,
And your directions are easy to follow
Have a good day
Diane
Thank you for your kind words Diane, I’m so glad you like my cards and videos!