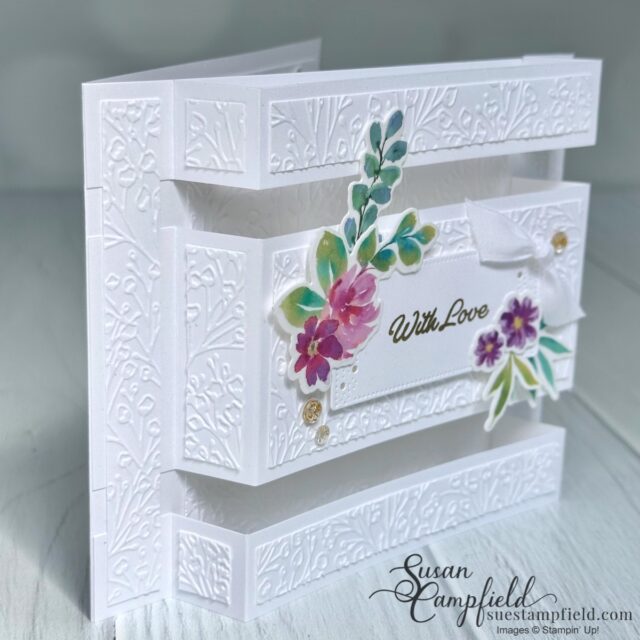
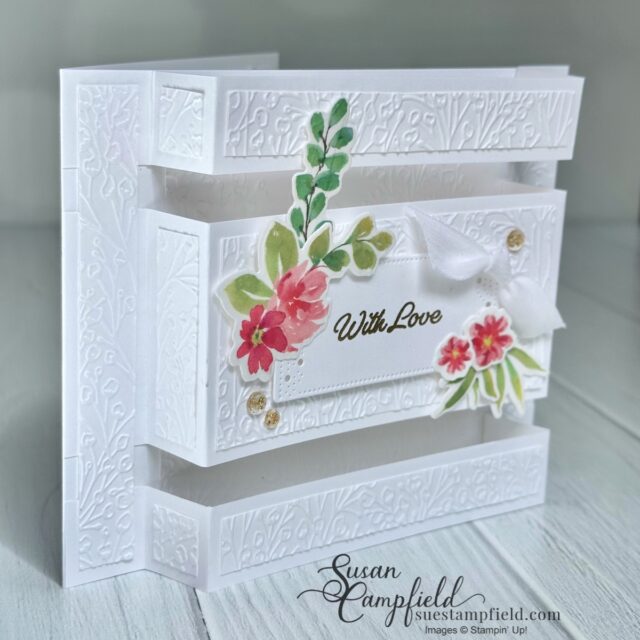
Make a statement with the Panorama Pop-Up Fun Fold — this horizontal card design features stacked panels that create depth but folds flat to fit in a standard A2 envelope.
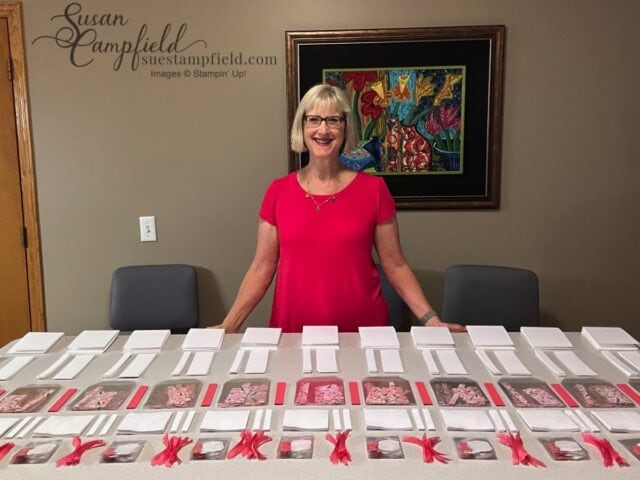
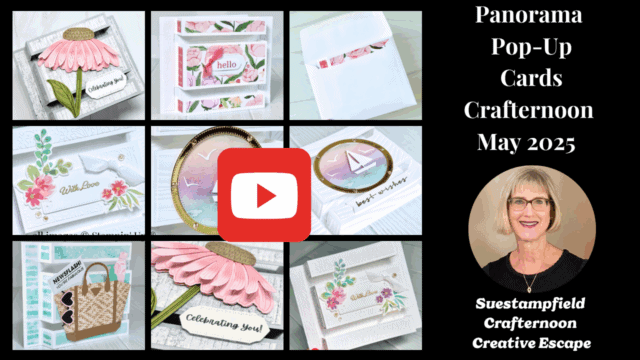
In the May Virtual Crafternoon class from Suestampfield, I’m building on last month’s vertical Pop-Up Parade card with a brand-new horizontal version that gives you even more space to show off your favorite papers, stamps, and die cuts. In this post, you’ll find five unique Panorama Pop-Up Card designs, a free video tutorial to follow along, and a step-by-step PDF tutorial available for purchase with instructions and photos for all five versions.
The dimension on this card when standing for display is truly incredible! Above are the five different versions featured in this blog post! Below are more details about each project, the video tutorial, and the PDF tutorial for purchase information.
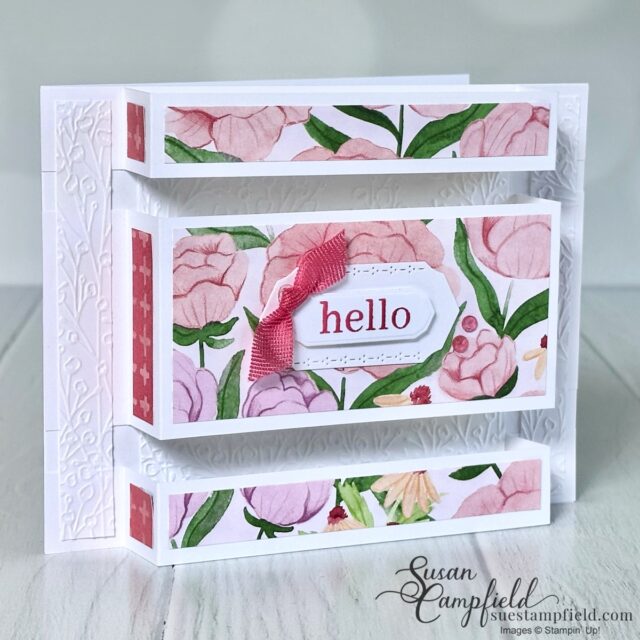
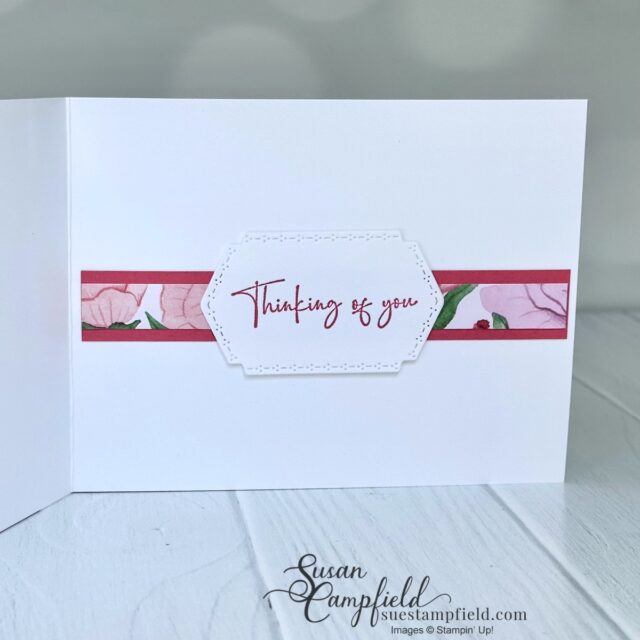
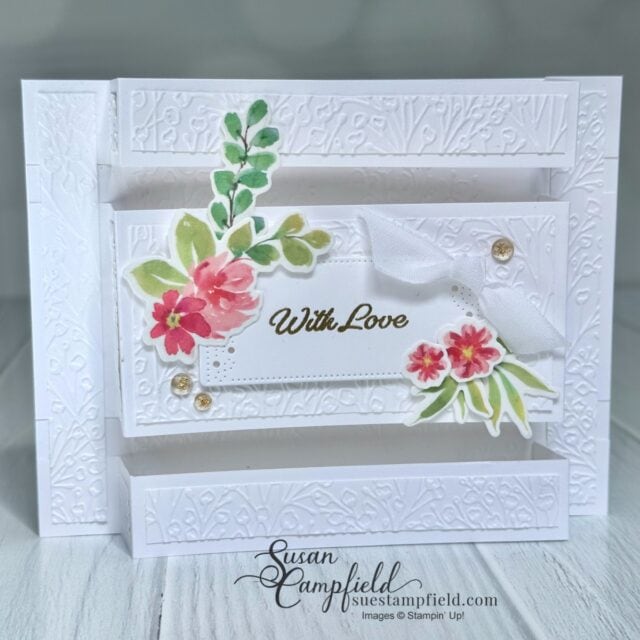
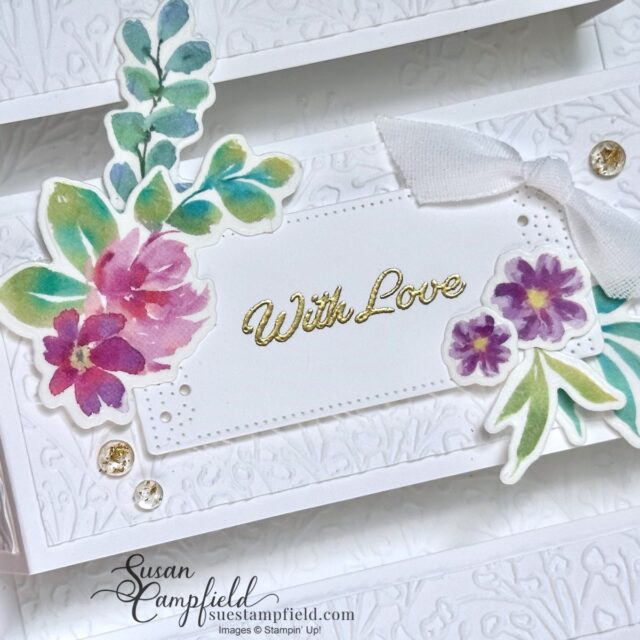
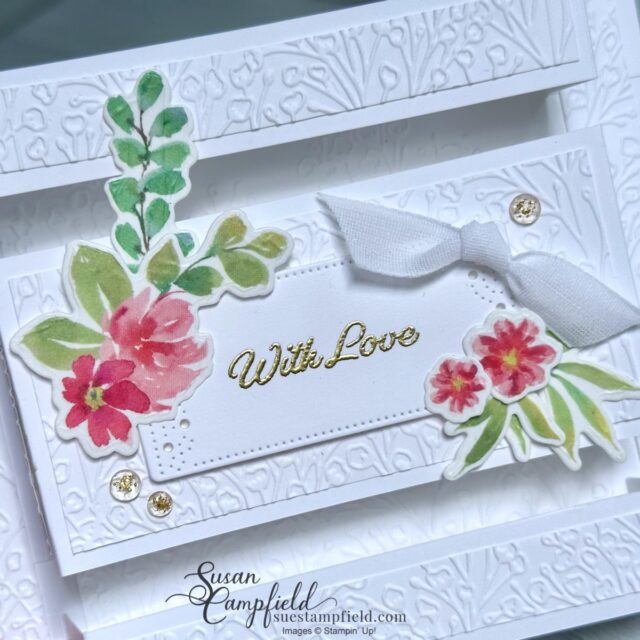
Florals In Bloom Panorama Pop-Up Card
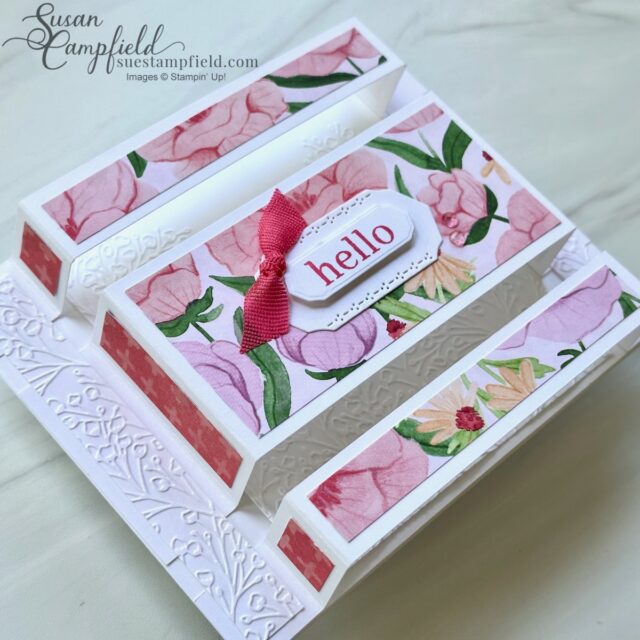
This first version features the beautiful Florals In Bloom Designer Series Paper, the Mixed Labels dies, and the Pressed Flowers embossing folder. Such a happy card to send! Customers who placed a $50 product order (after rewards credits and before tax & shipping) in my Stampin’ Up! online store in April received a packet in May to create this lovely card alongside me in the video tutorial.
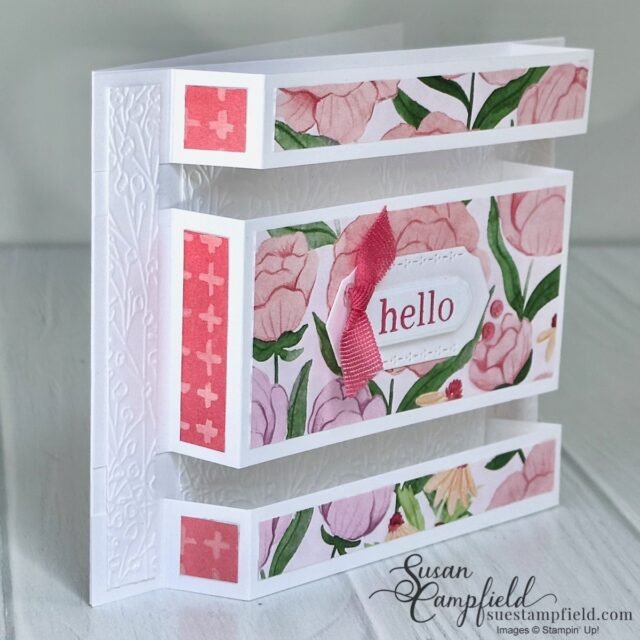
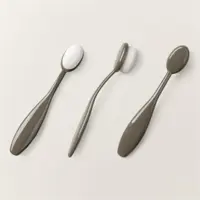
The Panorama Pop-Up Fun Fold Card pops up and stands beautifully for a 3D display….
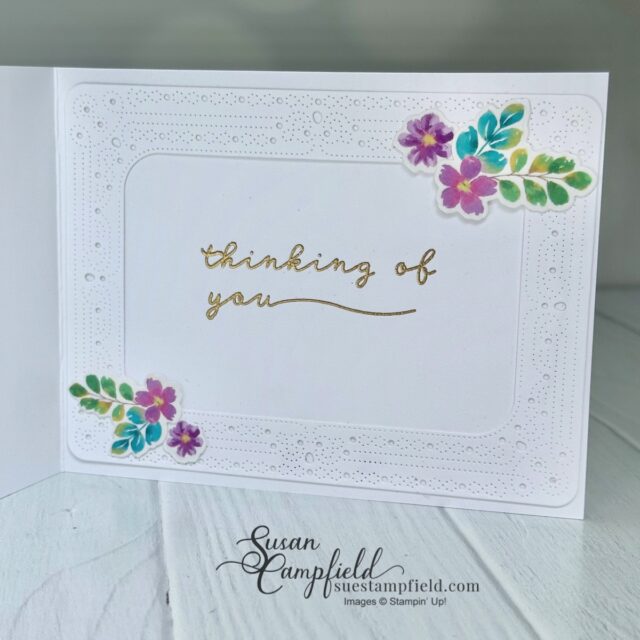
And opens up like a standard card, with a bit of the same pretty paper from the front of the card…

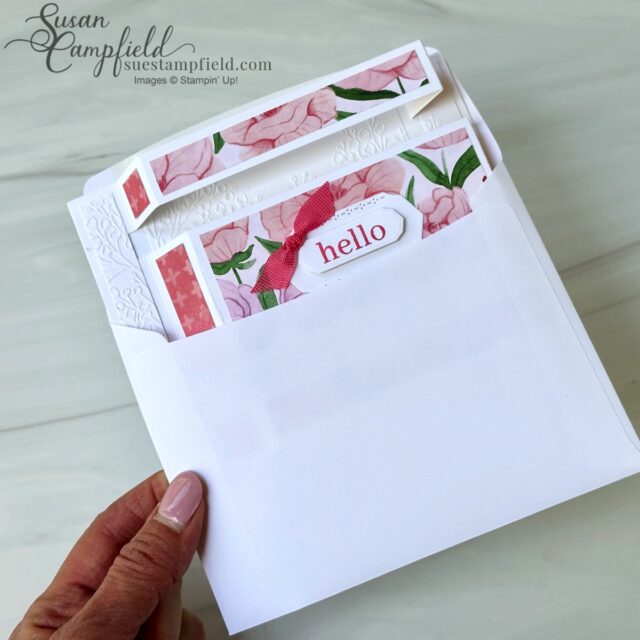
And flattens to slide into a standard envelope! Finished size for all the Panorama Pop-Up fun fold cards is 4-1/4″ x 5-1/2″ and they all fit in a standard A2 Envelope.
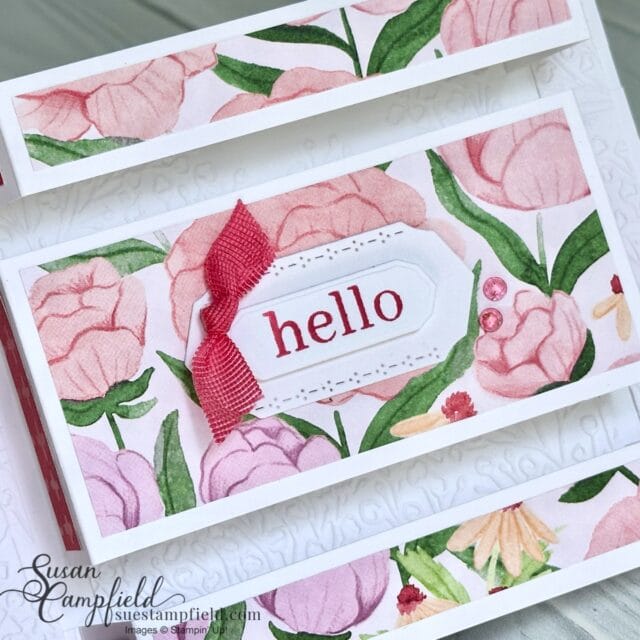
Finishing touches: a bit of sparkle from the Strawberry Slush & Pretty In Pink Gems and the Strawberry Slush Faux Linen ribbon.
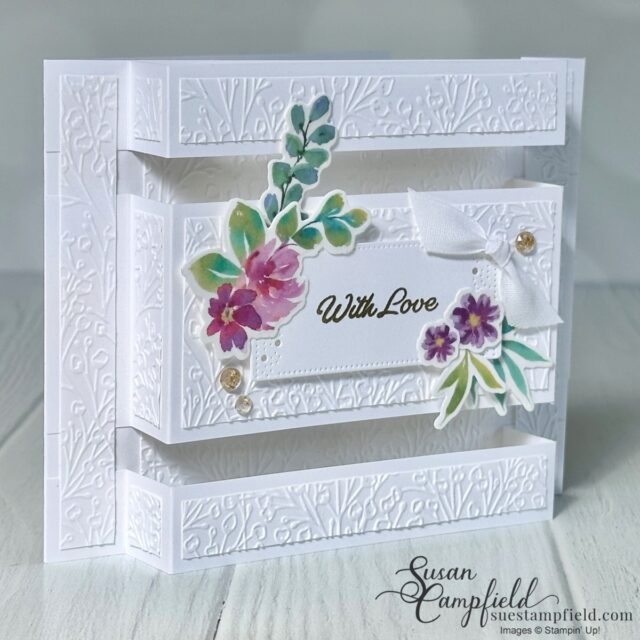
Extraordinary Flora Panorama Pop-Up Card
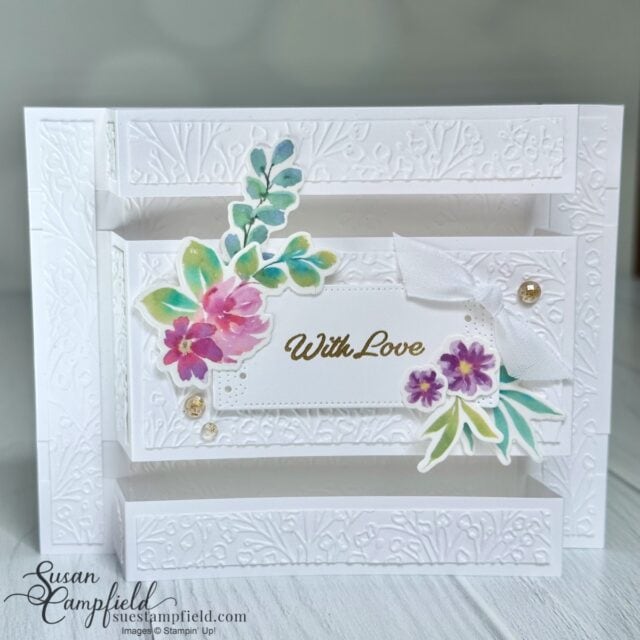
These Panorama Pop-Up cards were made using the Extraordinary Flora bundle, which includes a stamp set and coordinating dies. I used the Extraordinary Flora washi tape (sold separately) to create the floral elements—just adhere the tape to white cardstock before die cutting for a bright, clean look.
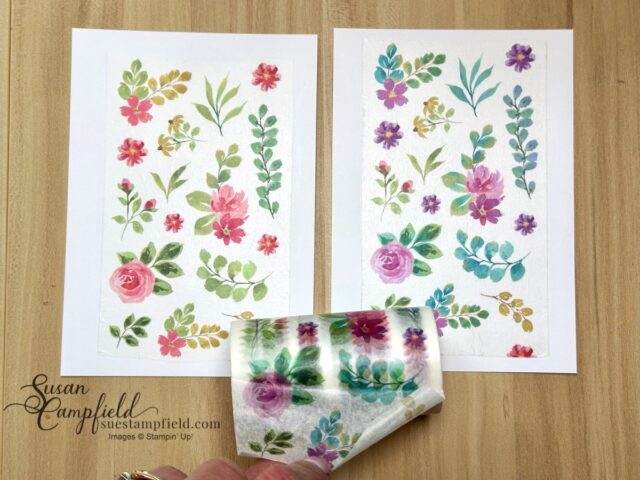
The washi tape has two different color variations of the flowers, so I just HAD to make a version using each color!
The background is embossed with the Pressed Flowers embossing folder to add texture without distracting from the pop-up design.
Such an elegant card! Perfect for weddings, anniversaries, or special birthdays.
For the inside of the card I used some more of the washi tape flowers (you get a LOT for every die cut!) and the large frame from the Sentimental Framing dies.
The gold embossing adds to the elegant look. The embellishments are also from the package of Strawberry Slush & Pretty In Pink Gems, which includes these clear gems with gold flecks.
The label on the front of the card is also from the Sentimental Framing dies. The added details on the borders of these dies make them very elegant.
The roll of washi tape has many, many sets of flowers, so one roll will make a lot of cards!
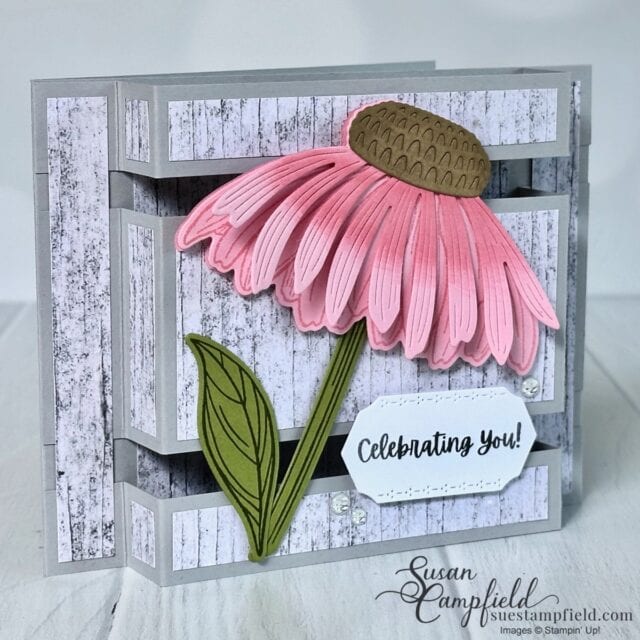
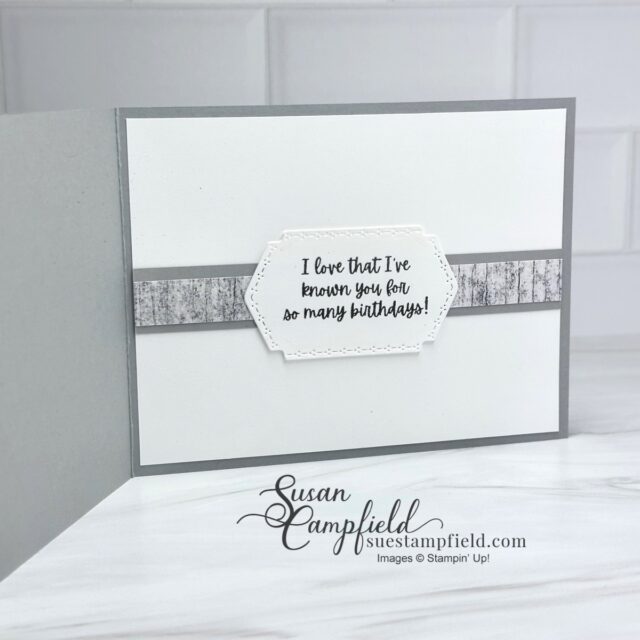
Are you ready to see more Panorama Pop-Up Fun Fold Cards? This is the Coneflower Celebrations Panorama Pop-Up Card!
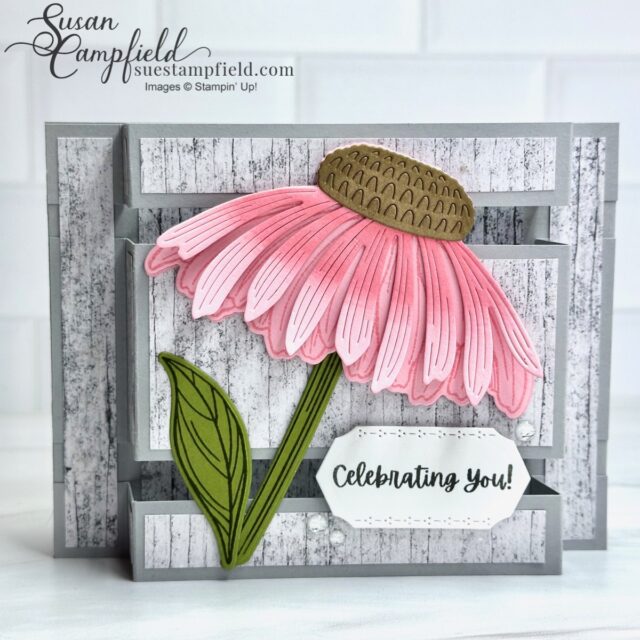
Wow! The Coneflower Celebrations bundle has some really unique dies that make a striking card! I paired this stunning flower with the Country Woods Designer Series Paper. It reminds me of a flower garden in a fenced yard!

For this version of the Panorama Pop-Out I used Designer Series Paper behind the pop-up panels. Most of the other versions have embossed panels.
The sentiments are also from the Coneflowers Celebration bundle and they are really great!
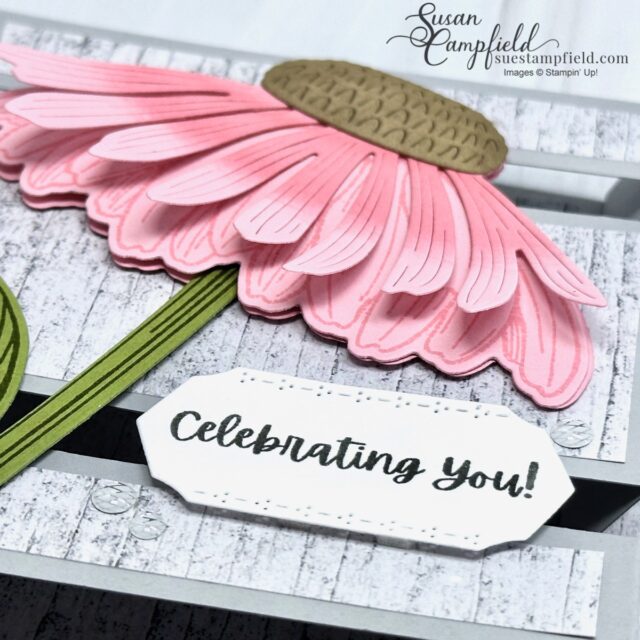
The base flower is made to be folded in half which adds tremendous dimension to the flower – especially with the top petals layered on. I walk you through the process, step-by-step in the detailed Panorama Pop-Up Card PDF tutorial, which includes step-by-step photos.

The embellishments that I chose to use are actually on sale right now and are a last chance product. They are the Pecan Pie & Clear Ribboned Adhesive-Backed Dots. The greeting labels are once again from the Mixed Labels dies – the same dies I used on the Florals In Bloom card.
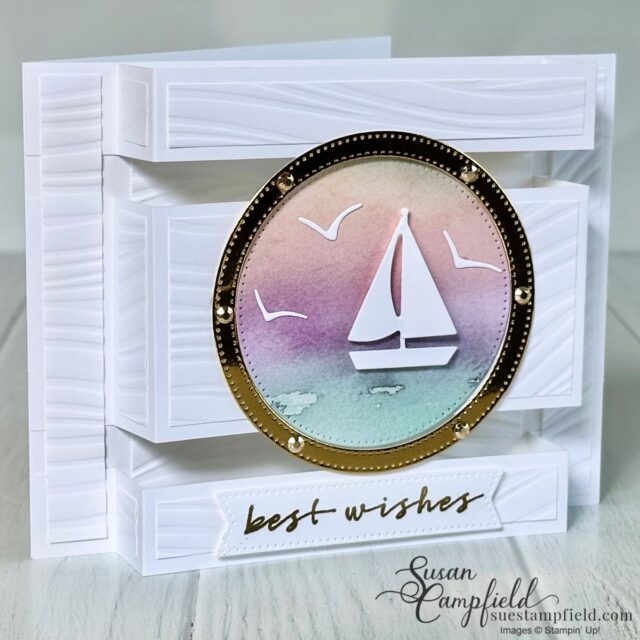
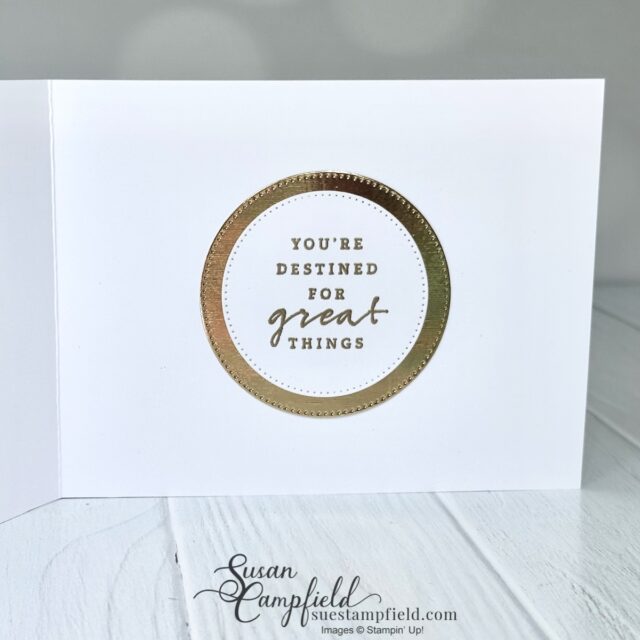
Peek through the porthole to see the Sunrise Sailing Panorama Pop-Out Card!
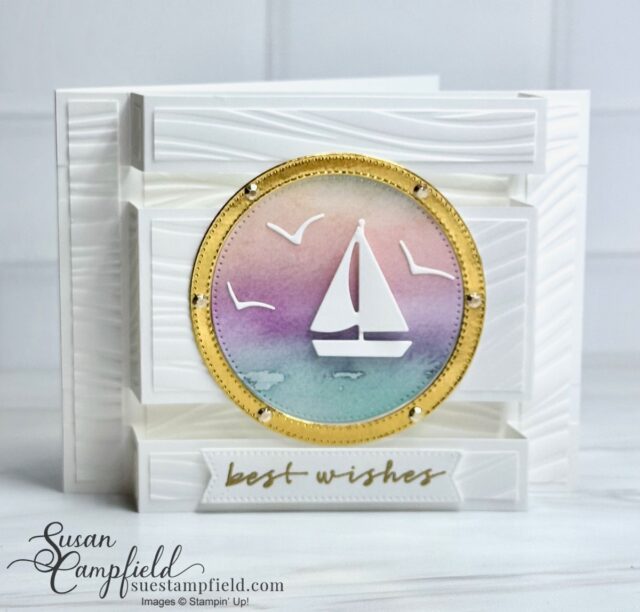
Ahoy! I love this “porthole view” card with the Sunrise Sailing bundle! This set is perfect for masculine cards, 4th of July cards, graduation, retirement, or summer birthdays.
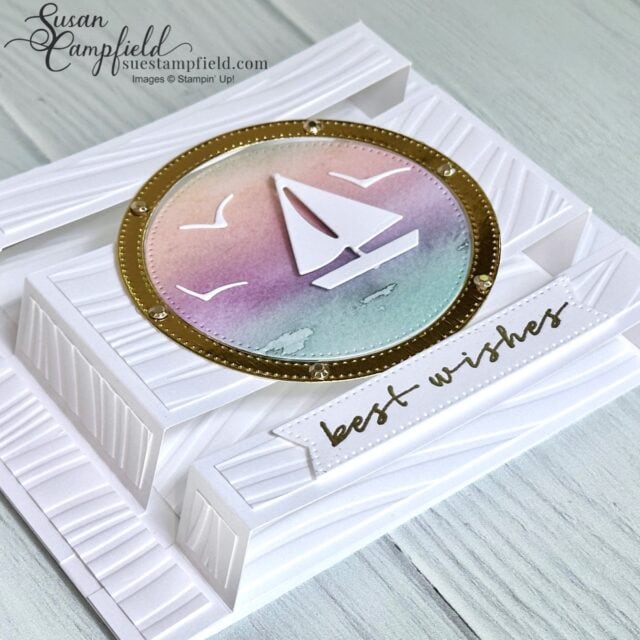
I created the porthole with the Stylish Shapes dies – all the details are in the PDF tutorial! I used the Soft Waves 3D embossing folder for this card and the Thoughtful Journey Designer Series Paper.
The leftover bit from inside the porthole makes a great layer for the inside of the card.
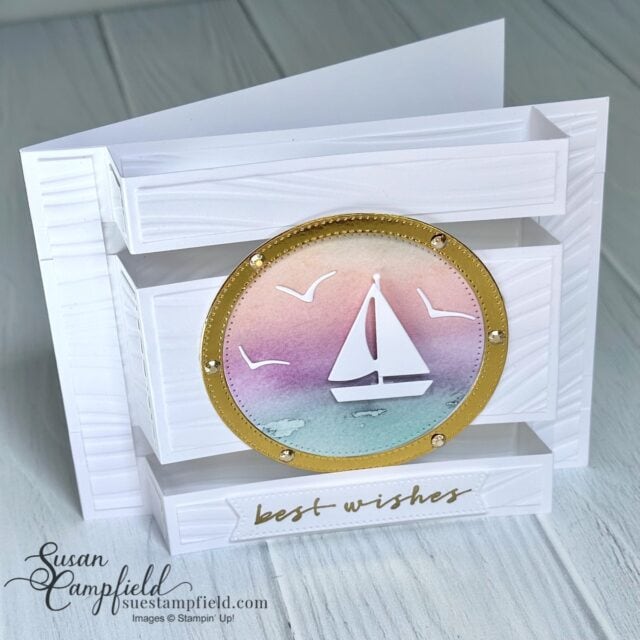
In this “top down view” you can really see the dimension on the Panorama Pop-Up cards! Special thank you to demonstrator Chrissy Graham for her incentive trip “porthole” swap card – it helped to inspire the porthole idea for this card!
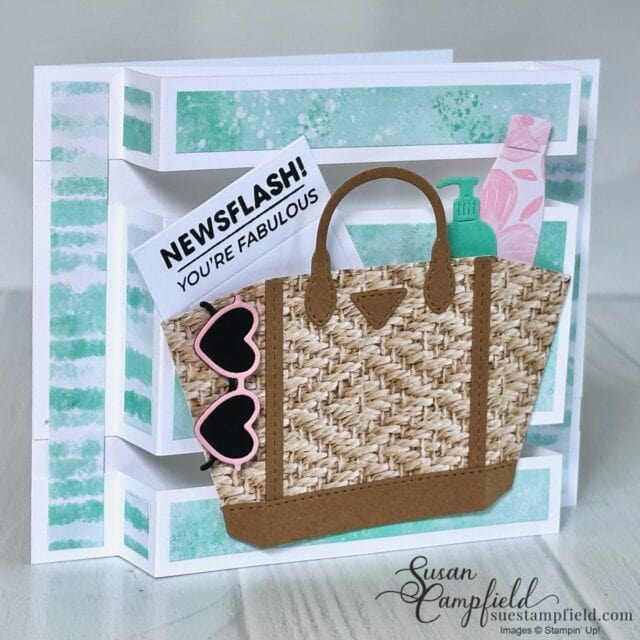
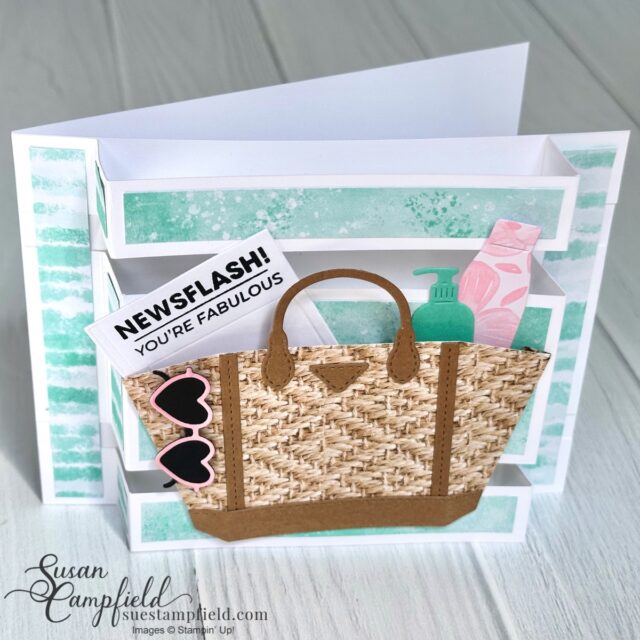
Notes & Totes Panorama Pop-Up Card!
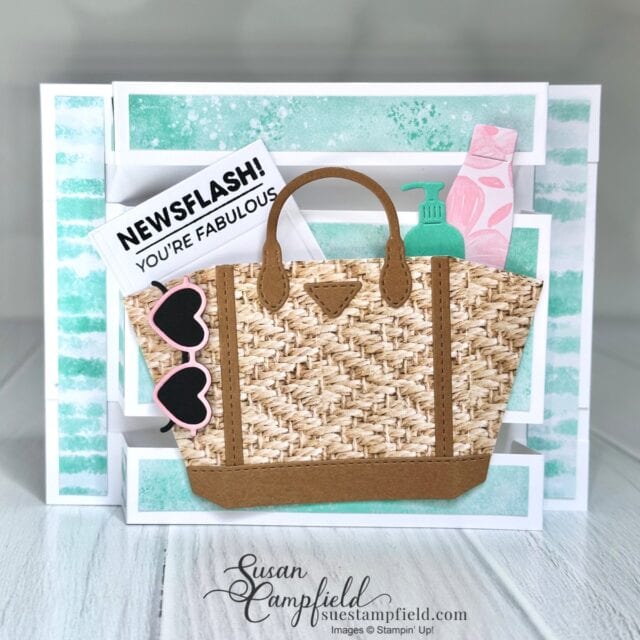
The perfect card for summer! This card uses the Notes & Totes bundle, the Woven Textures Designer Series Paper, and the 2024-2026 In Color Designer Series Papers.
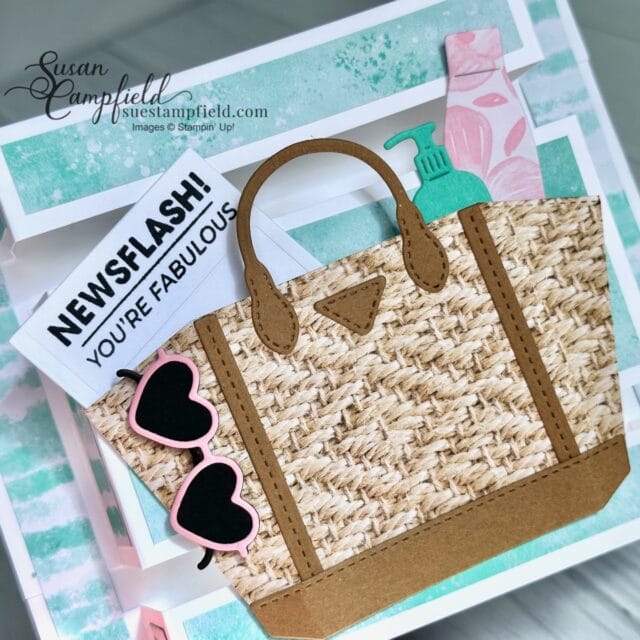
With all the cute dies in the Notes & Totes bundle, no extra embellishments are needed! I walk you through the process to make this card, step-by-step in the detailed PDF tutorial.
I chose a sentiment that would be perfect for someone heading off on a special vacation, a thank you for a teacher who has the summer off, or just sending summer wishes!
Demonstrator Patti Brunter shared a Notes & Totes card that used the Woven Textures Designer Series Paper and it inspired the tote portion of this card – thank you Patti!
Would you like to create along with me in the next Crafternoon?
It’s easy to join the virtual monthly Crafternoon event – I hope you join us next month!
How to join the fun? When you place a $50 Stampin’ Up! product order with me (before tax and shipping) you will receive a packet in the mail the following month for the next Crafternoon AND you will get the PDF tutorial for that month’s Crafternoon fun fold cards for free! No host code is required. The tutorial has all the card designs with dimensions, step-by-step instructions, photos, and the supplies for the projects. A whole lot of love always goes into each and every packet! ❤️ Unfortunately I am only able to accept Stampin’ Up! product orders from those who live in the United States. However anyone around the globe can purchase any of the Crafternoon tutorials – you can find them all HERE.
Video tutorial for the Panorama Pop-Up Cards
In this video, I walk you through assembling the Florals In Bloom Pop-Up card. Details for all the designs are in the Panorama Pop-Up Cards digital PDF tutorial including all of the dimensions, supplies, and step-by-step instructions for all the cards. The digital tutorial can be downloaded and printed to refer to while you craft. Or you can save the tutorial to your device and look at it that way.
Details about the Panorama Pop-Up Card Tutorial for purchase are below!

Ready to make the Panorama Pop-Up cards? It is easy with this tutorial. You can purchase the Panorama Pop-Up Card Tutorial for $15 US. Print the tutorial or review it on your device after you download it. The tutorial will walk you through how to recreate this fun fold style, step-by-step with instructions for all of the versions.
If you missed last month’s Pop-Up Parade card (the vertical version of this fold), you can check it out here for even more fun fold inspiration!
I started Crafternoon in January of 2022 with a different unique fun fold every month. You can check out ALL 41 Crafternoon Fun Folds HERE.
NOTE: If you are a Stampin’ Up! demonstrator you are welcome to purchase these tutorials! If you would like to use these ideas to teach a class, instructing verbally is fine. However, please do NOT hand out, forward, replicate, or copy my written tutorials. If your customers wish to purchase the written tutorials please direct them to this blog post. Thank you for understanding!
Join the Crafternoon fun!
Thank you for letting me share this creative fun fold with you! I would love to send you a packet for next month’s Suestampfield Crafternoon Creative Escape. If you live in the United States, to qualify for a packet and tutorial, simply place a $50 order of Stampin’ Up! product (after rewards credits and before tax and shipping) in my online Stampin’ Up! store HERE. No host code required. Happy creating!


Susan, I love this great design and the beautiful examples you are showing us. Happy Memorial Weekend. Enjoy your day!
Thank you so much for your kind words Hilda! I’m so glad you liked these cards 💖
I did not receive a free PDF tutorial.
Hi Barbara. Your May order qualifies you for the Suestampfield Crafternoon Creative Escape in June – including the free PDF tutorial after the June event. So excited to have you take part in this fun monthly event! You should have an email from me with more details, I’ve just re-sent to you to be sure you have the information. I look forward to creating with you soon!
I’m sorry to be a bother. I never received the tutorial for each card that was intended for the May afternoon crafters.
Sandy
Sandy, you are never a bother!! I double-checked and the tutorial was emailed to you on 5/24/25. I’m resending to your email right now, if you don’t find the message please contact me here: https://susancampfield.stampinup.net/contact_me.